Fig Balsamic Caramelized Onions, Farro and Pumpernickel Bread Stuffing

Balsamic Caramelized Onions Pumpernickel Stuffing Feature

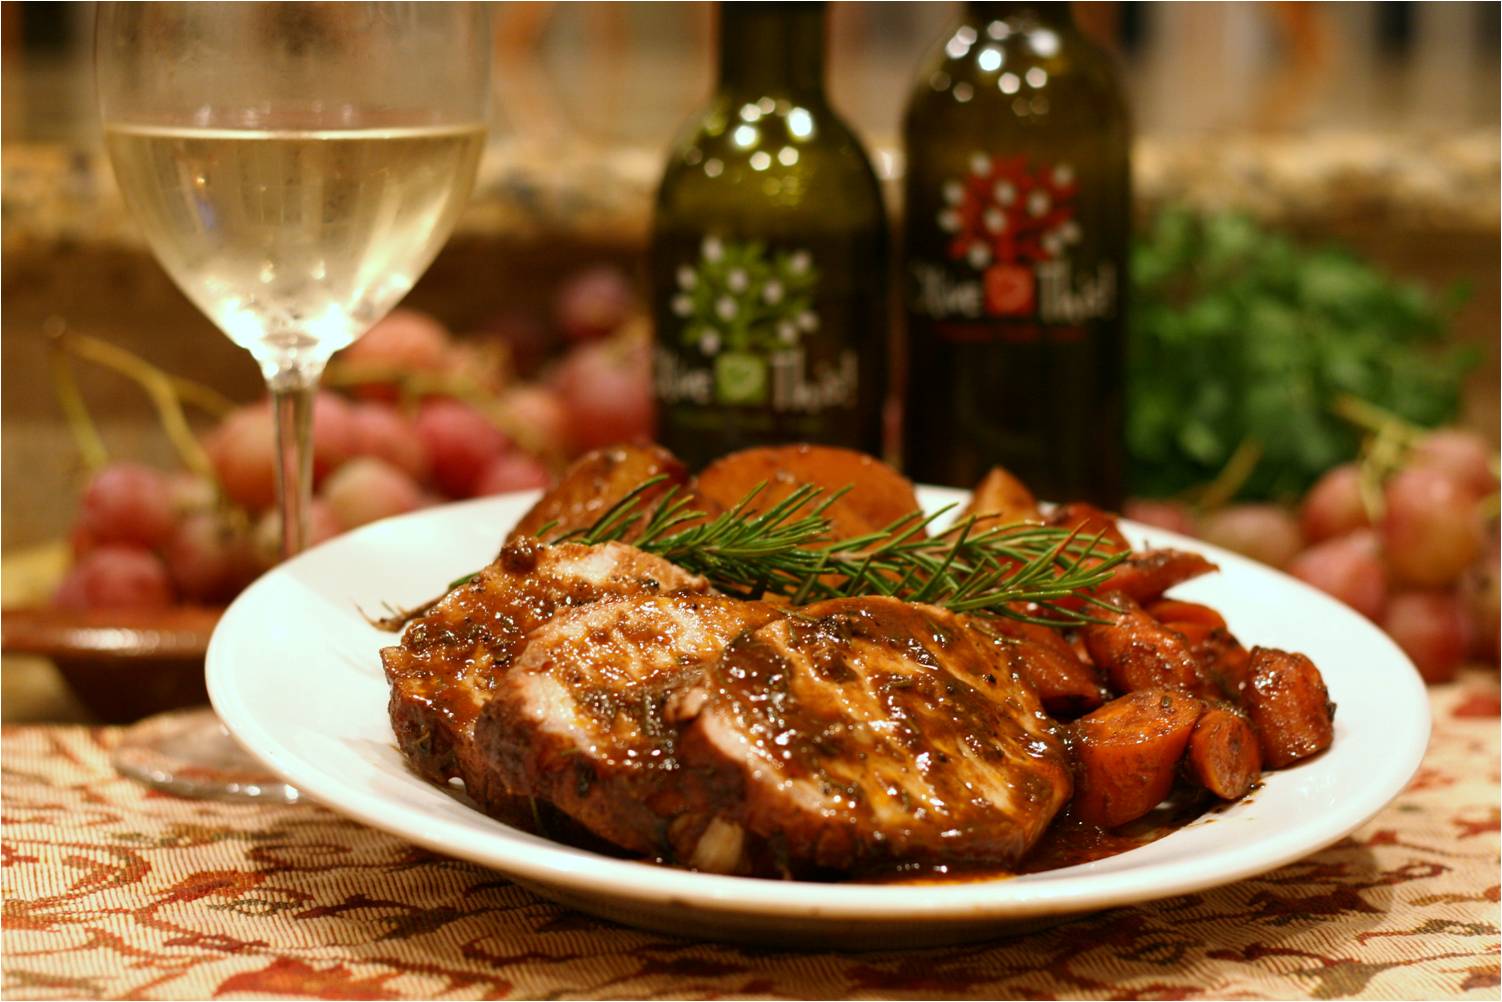
Last year we made an Apple and Sausage Stuffing with our Wild Mushroom and Sage Olive Oil. This year the same olive oil is back but with a whole new cast of supporting actors. Thanksgiving has its traditions but every once in a while you want to mix it up just a little by trying something new. Want to try a new stuffing/dressing? These healthy ingredients come together to offer such great flavor and it just might be possible that the caramelized onions are the surprise standouts of this dish. Slow cooking naturally sweet onions in good quality olive oil brings out rich flavor from an otherwise basic ingredient.  Take it a step further and enhance the caramelization by using our high quality, aged balsamic vinegar to finish it off. For ideal texture and flavor, dry out the breadcrumbs by either letting them sit on the counter for a day or two or in the oven for 45 minutes.  Consistent with most of our other recipes this time of year, this dish can be made ahead – up to a day ahead. During the holidays, the more you can make ahead the less stress on that special day and the more time to spend with your guests!

INGREDIENTS

Balsamic Caramelized Onions Pumpernickel stuffing Ingredients

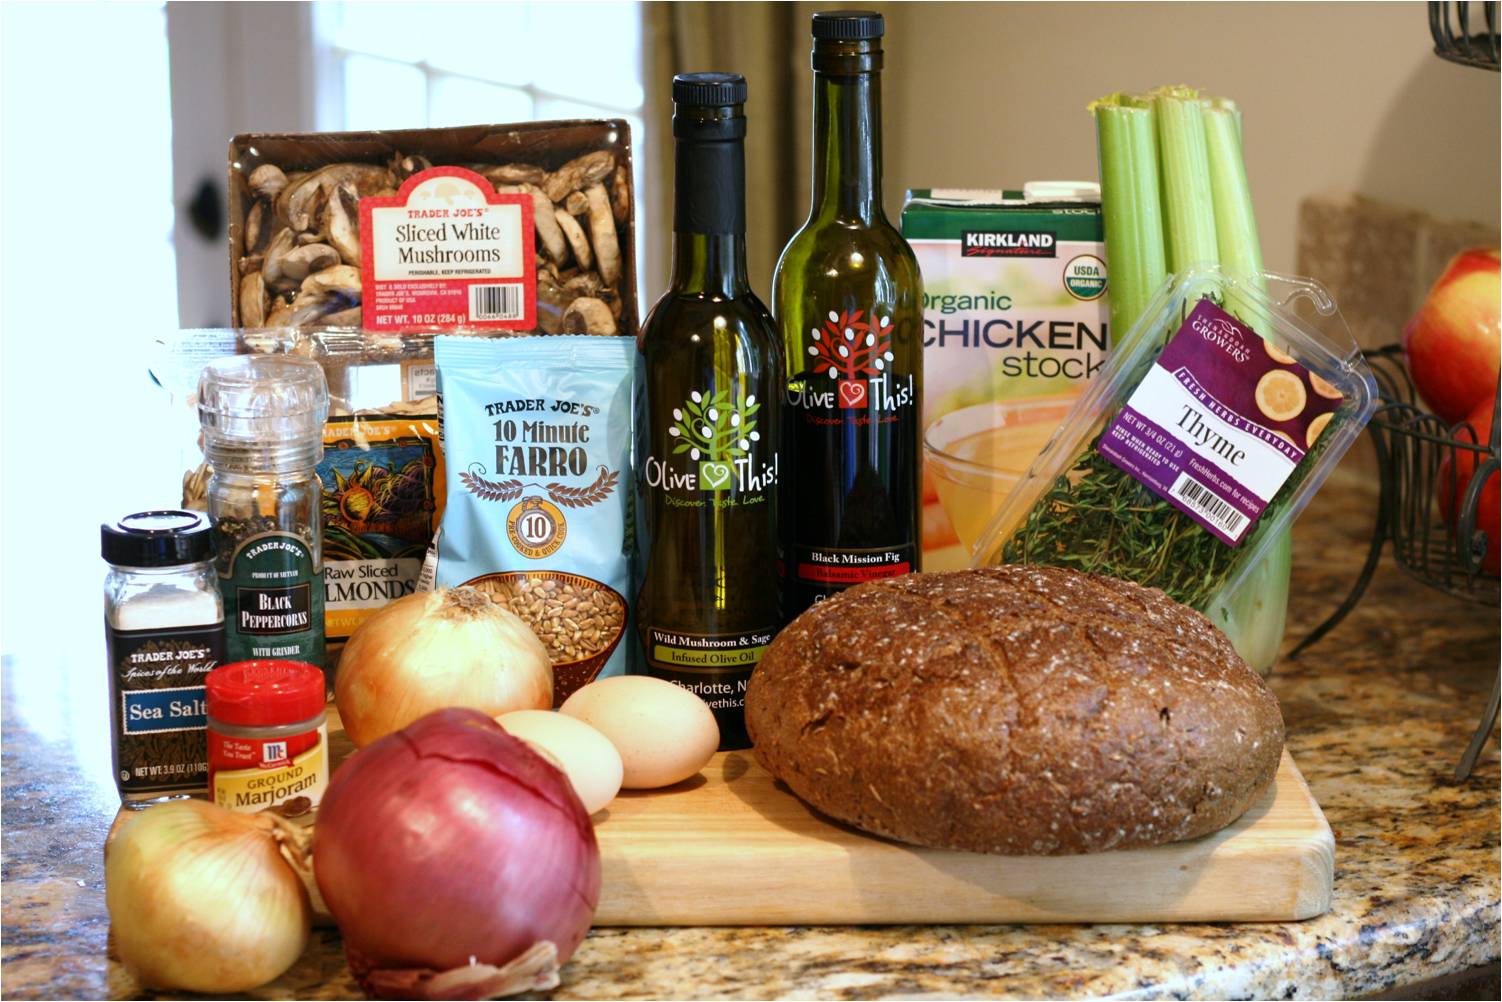
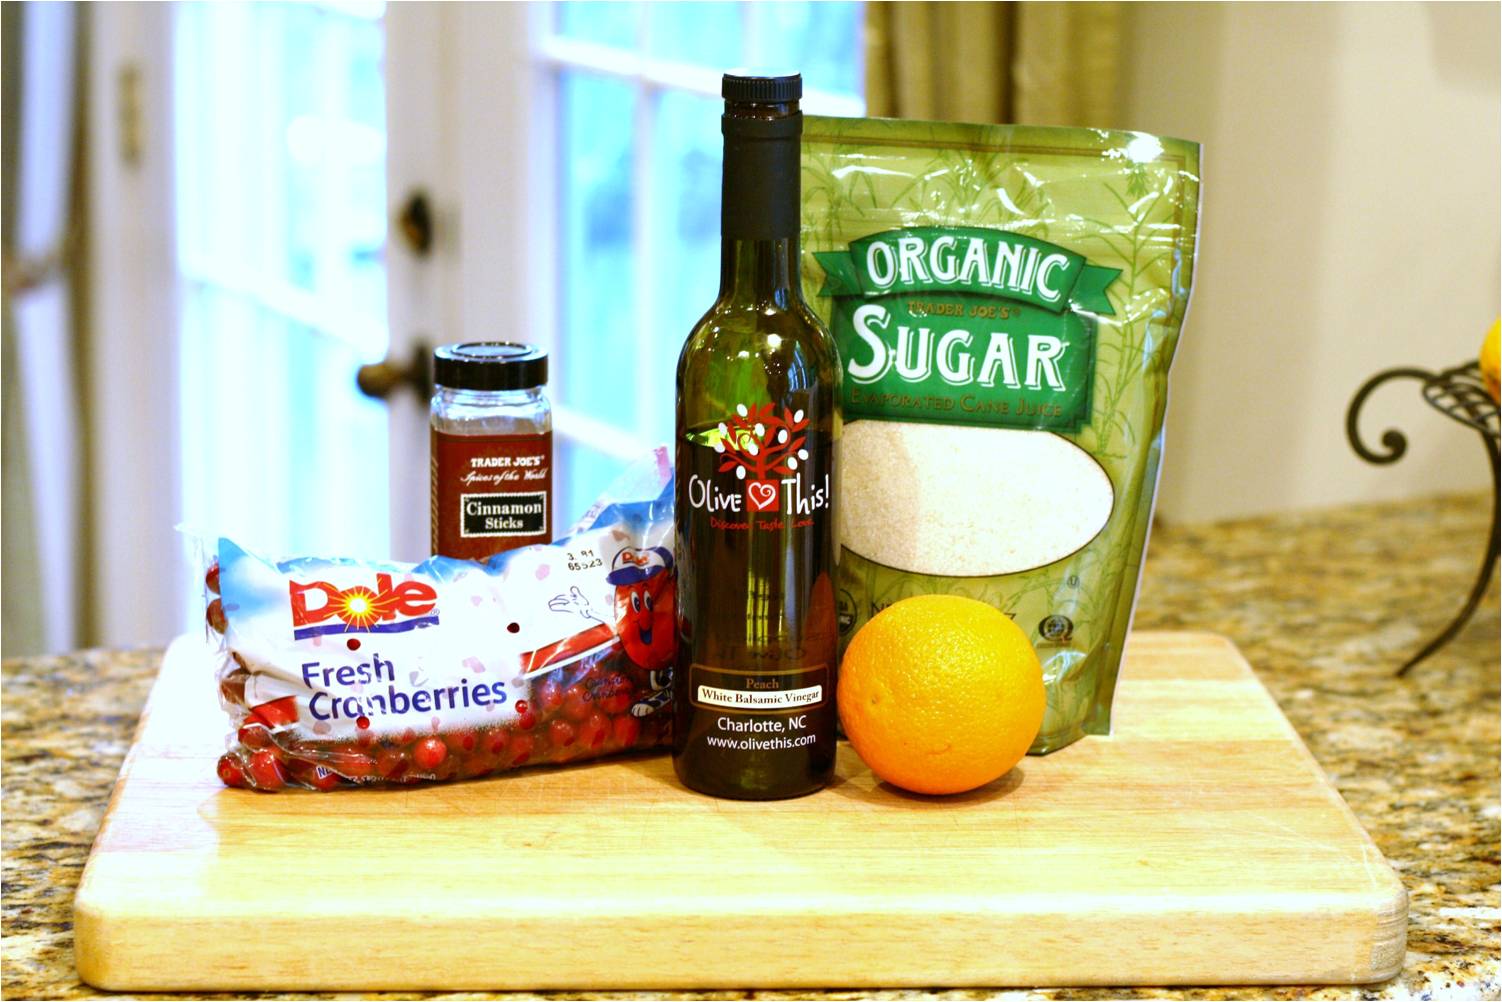
  • 1 pound of good quality, crusty pumpernickel bread cut into ¾-inch cubes, about 6 cups
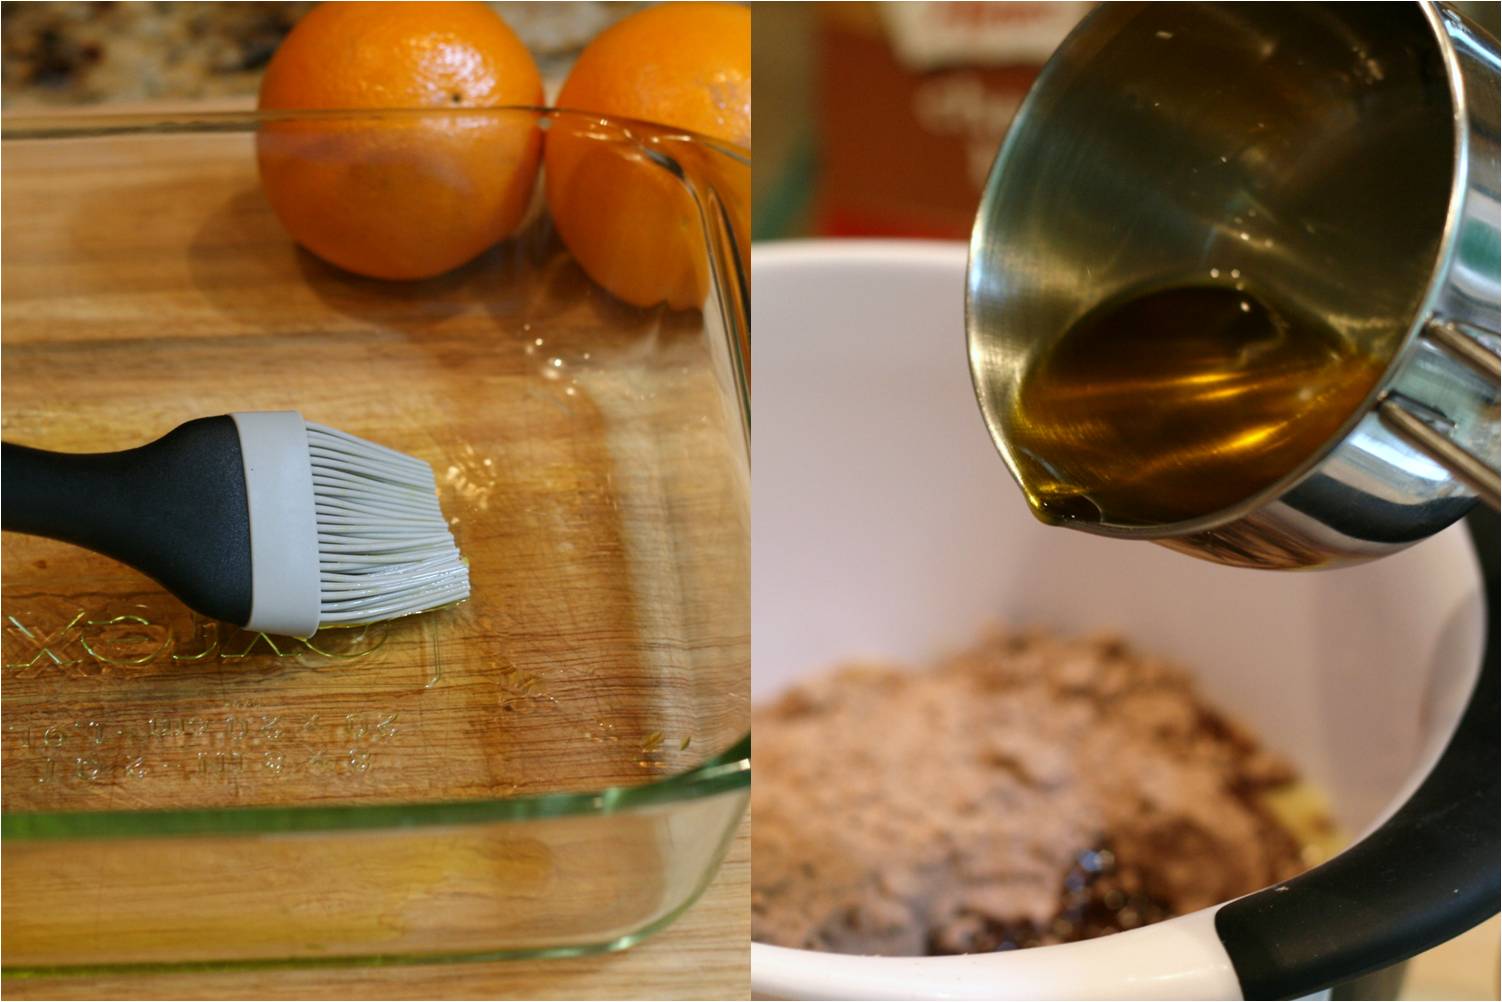
  • 4 tablespoons Olive This! Wild Mushroom and Sage Olive Oil, divided, plus extra for preparing the baking dish
  • 1 large red onion, or 1 medium and 1 small, about 1½ cups chopped (see instructions)
  • 1 large yellow onion, or 1 medium and 1 small, about 1½ cups chopped (see instructions)
  • 3 tablespoons Olive This! Fig Balsamic Vinegar
  • 3 ribs of celery, chopped
  • 10 ounces sliced white mushrooms
  • 1½ tablespoons fresh thyme leaves, or ½ teaspoon dried
  • ¼ teaspoon ground marjoram
  • 1½ cups of uncooked farro, prepared according to package directions
  • ½ cup sliced almonds
  • 1½ cups chicken stock
  • 2 eggs, lightly beaten
  • 1½ teaspoon salt
  • 1 teaspoon pepper

DIRECTIONS

If you let your bread cubes dry out on the counter for a few days (as described above) then skip this step and go right on to the next. Otherwise, adjust oven rack to center position and heat oven to 300 degrees F.

Prepare Pumpernickel Croutons

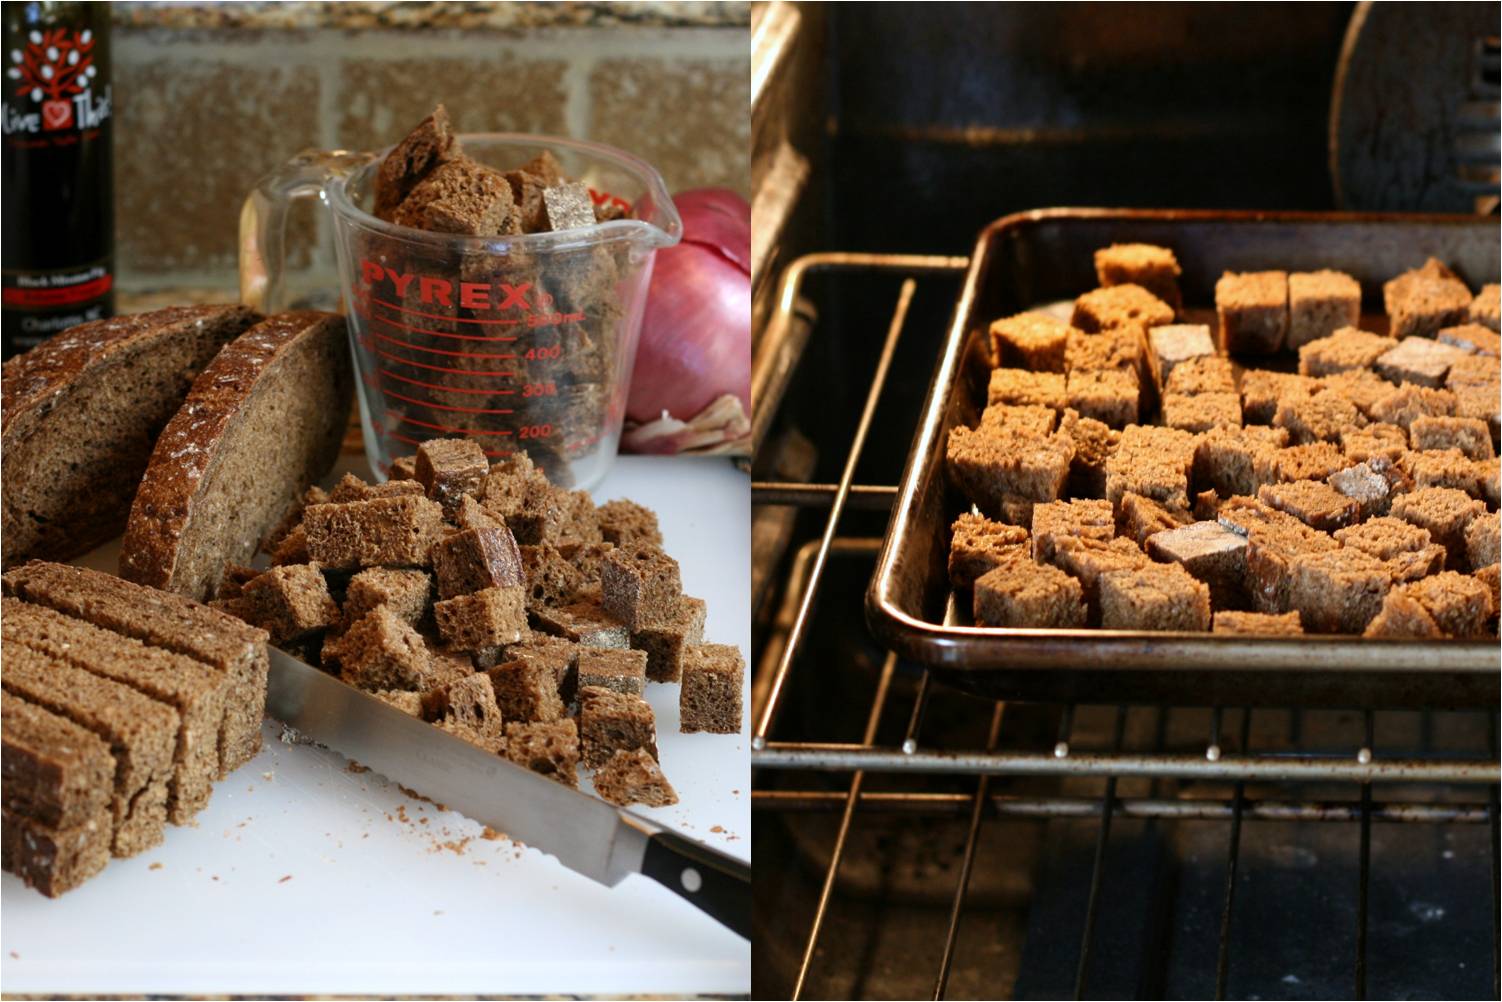
Cube enough pumpernickel bread to measure out 6 cups. Spread in a single layer onto a baking sheet and dry out in the oven for about 30 minutes. After removing the bread from the oven, increase the heat to 400 degrees F. Let the bread cubes completely cool. While they’re in the oven, however, you can start on caramelizing your onions and preparing the farro.

Slice Red Onion for Caramlizing

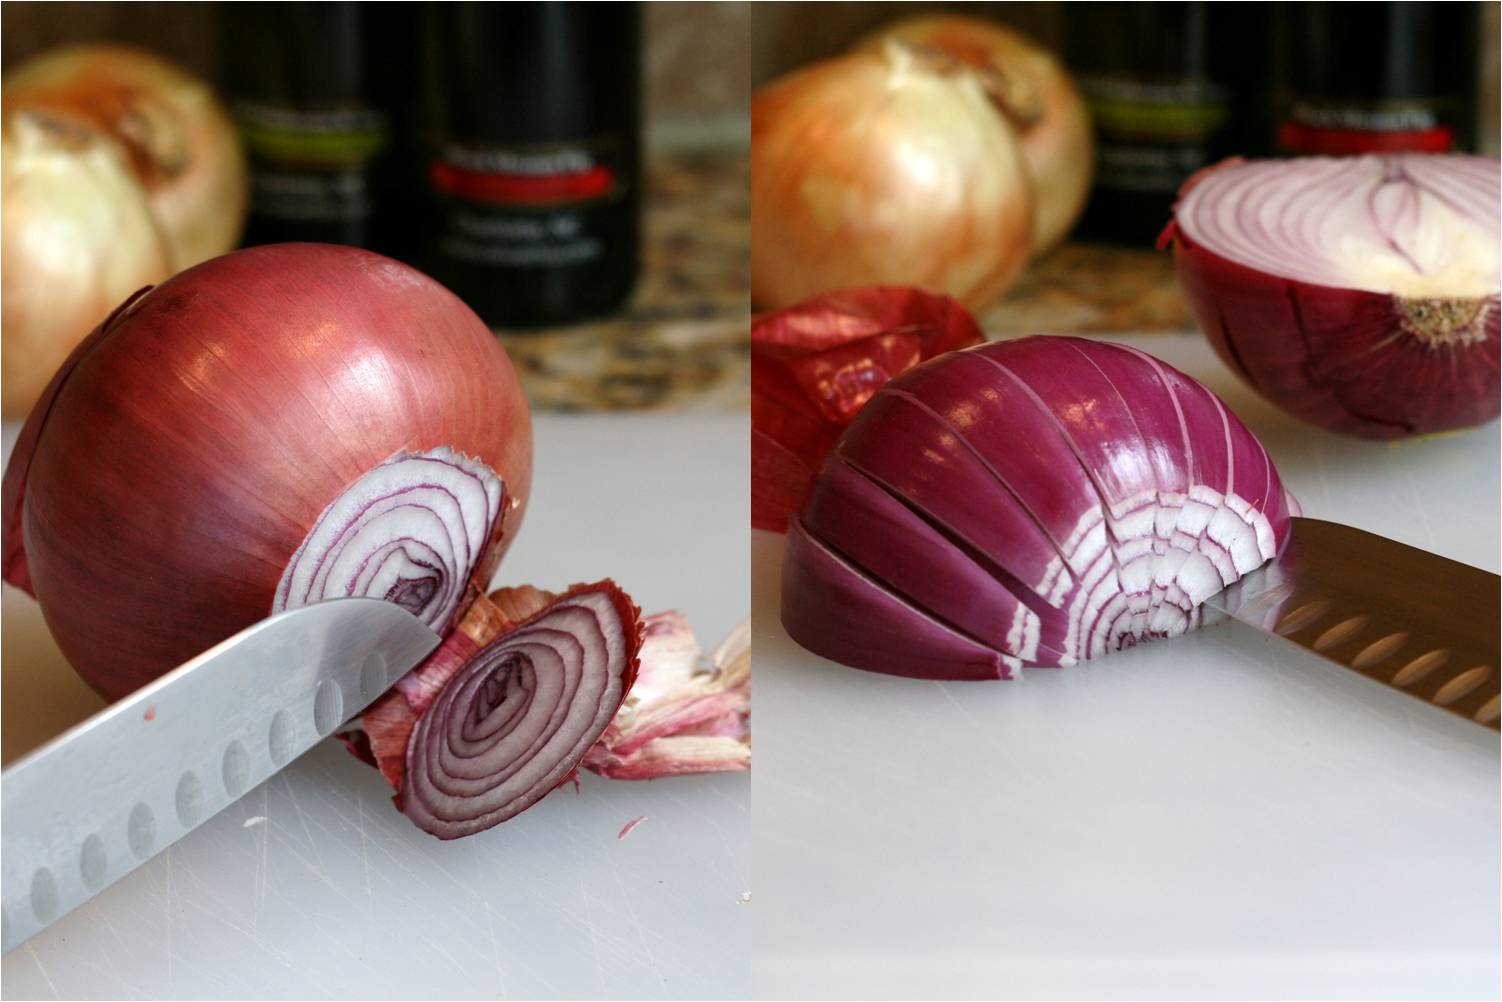
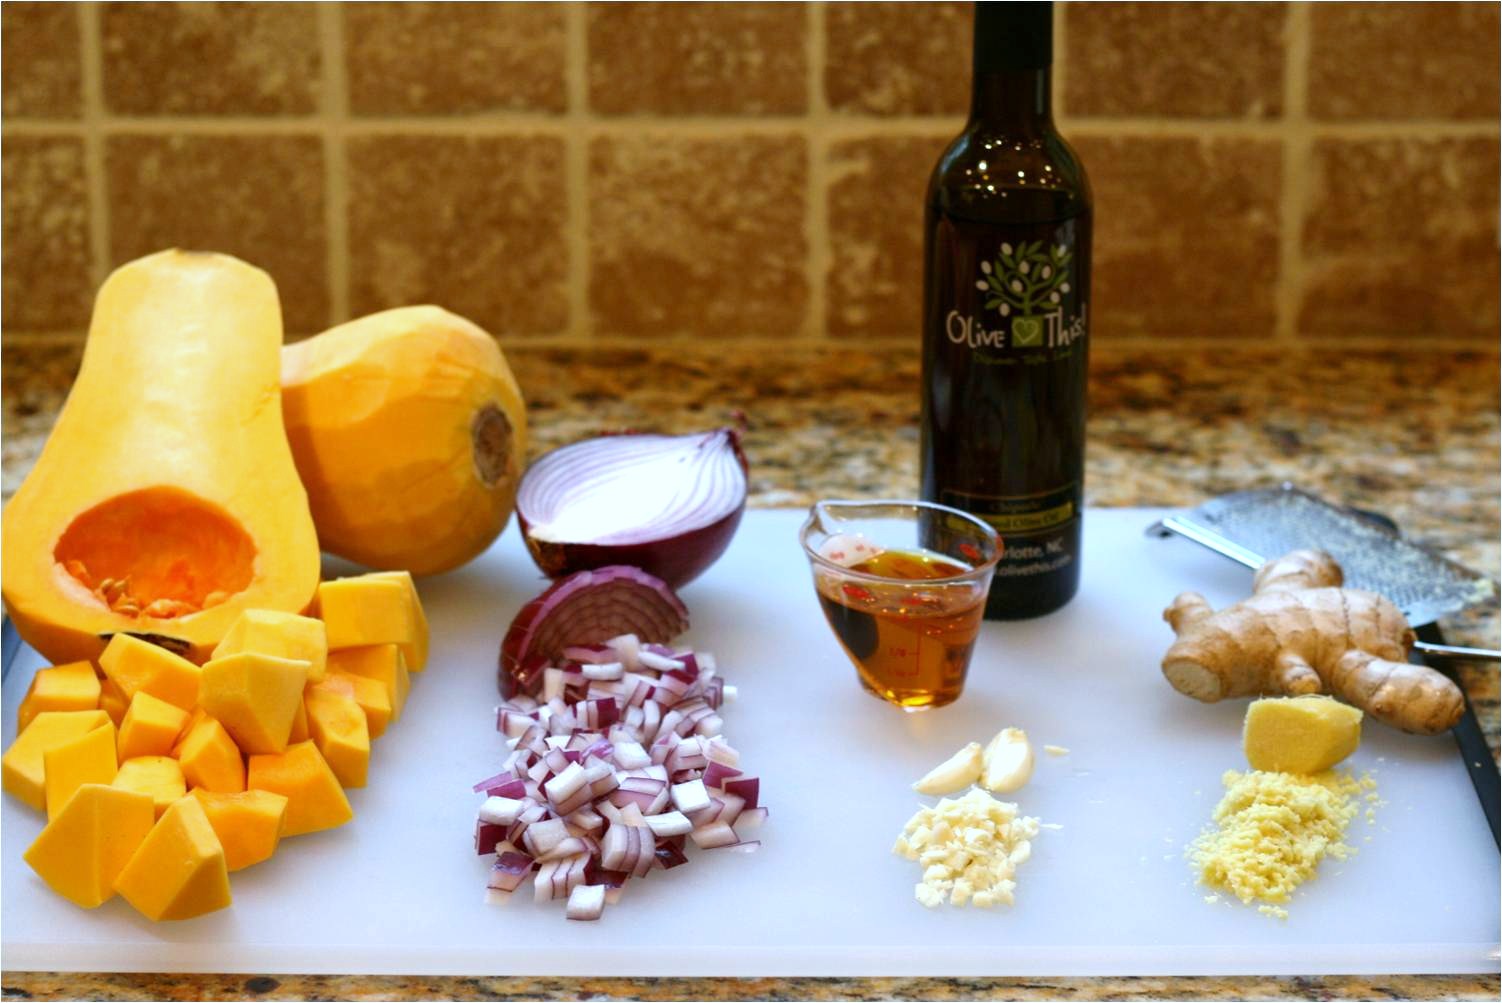
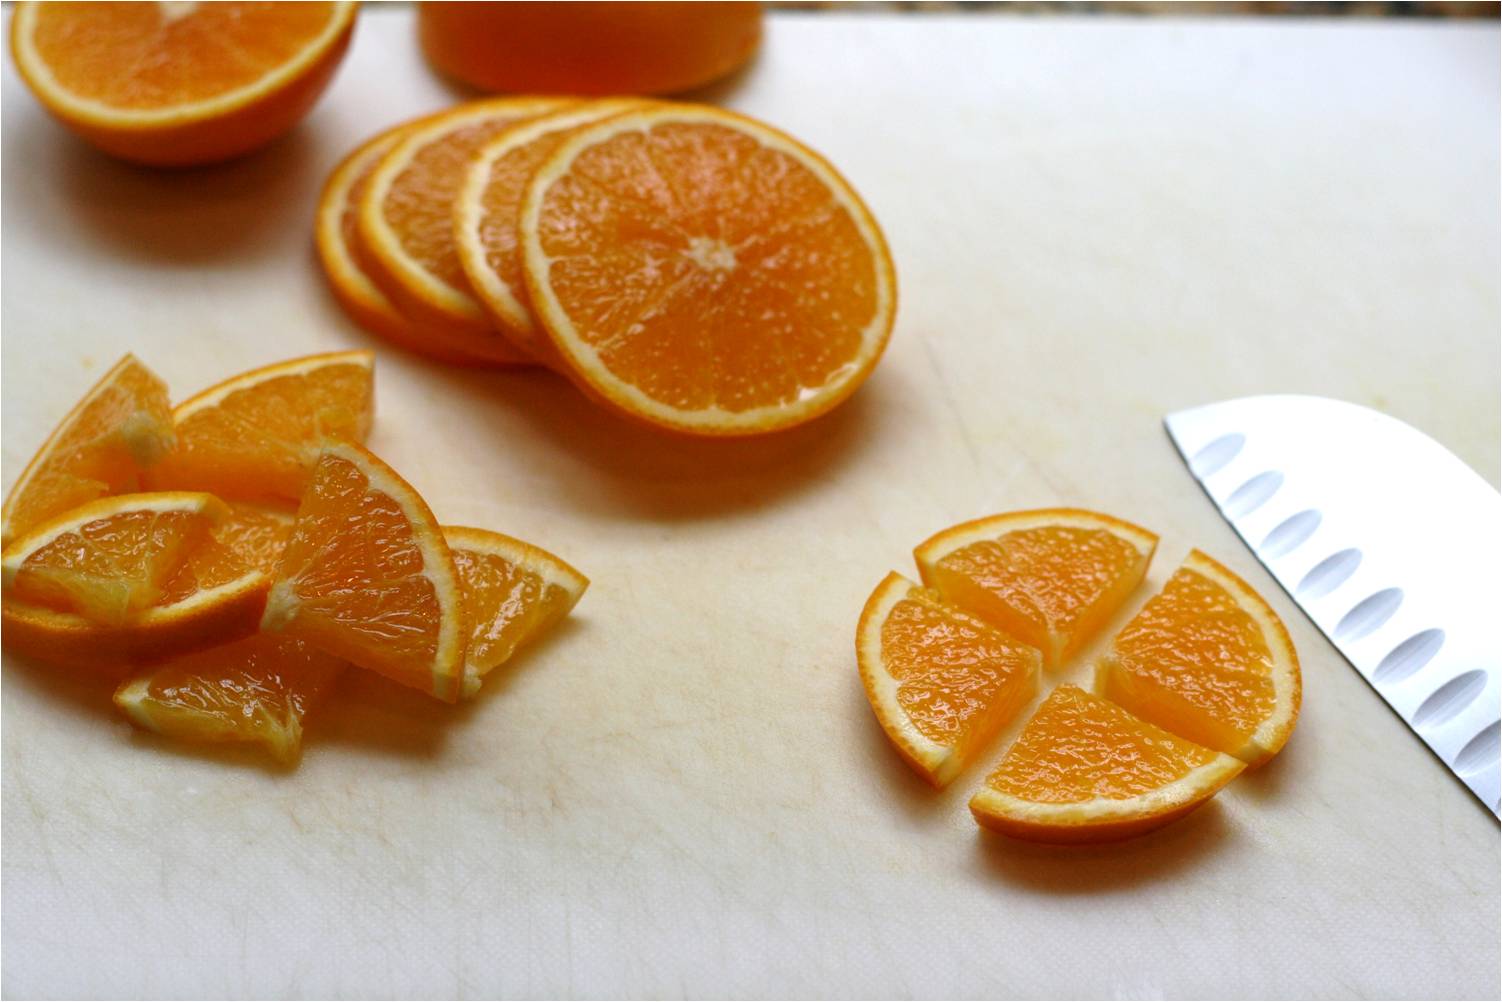
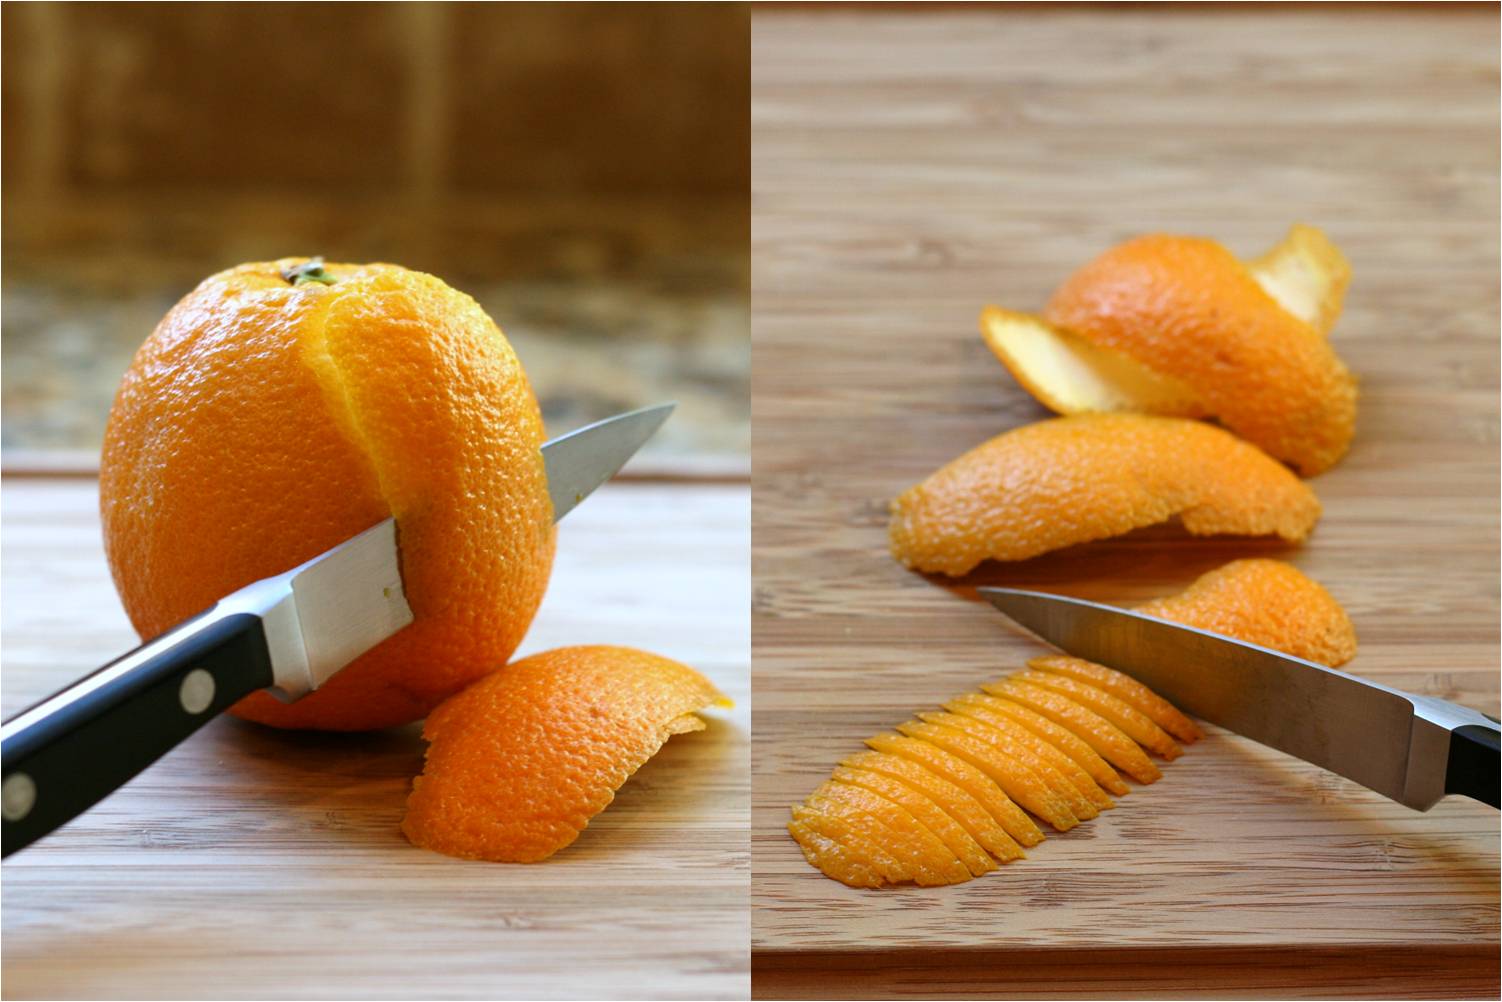
Remove the stem side of the onion leaving the root end to hold it all together. Cut the onion in half lengthwise through the root. Placing the cut side down, make cuts about ½ inch apart from the outside layer towards the center (see photo).

Chopped Red Onions for Caramelizing

Next, make one slice crosswise cutting the slices in half. Remove the root end by making a V-cut. Repeat for the rest of the onions.

Red Onions Browning

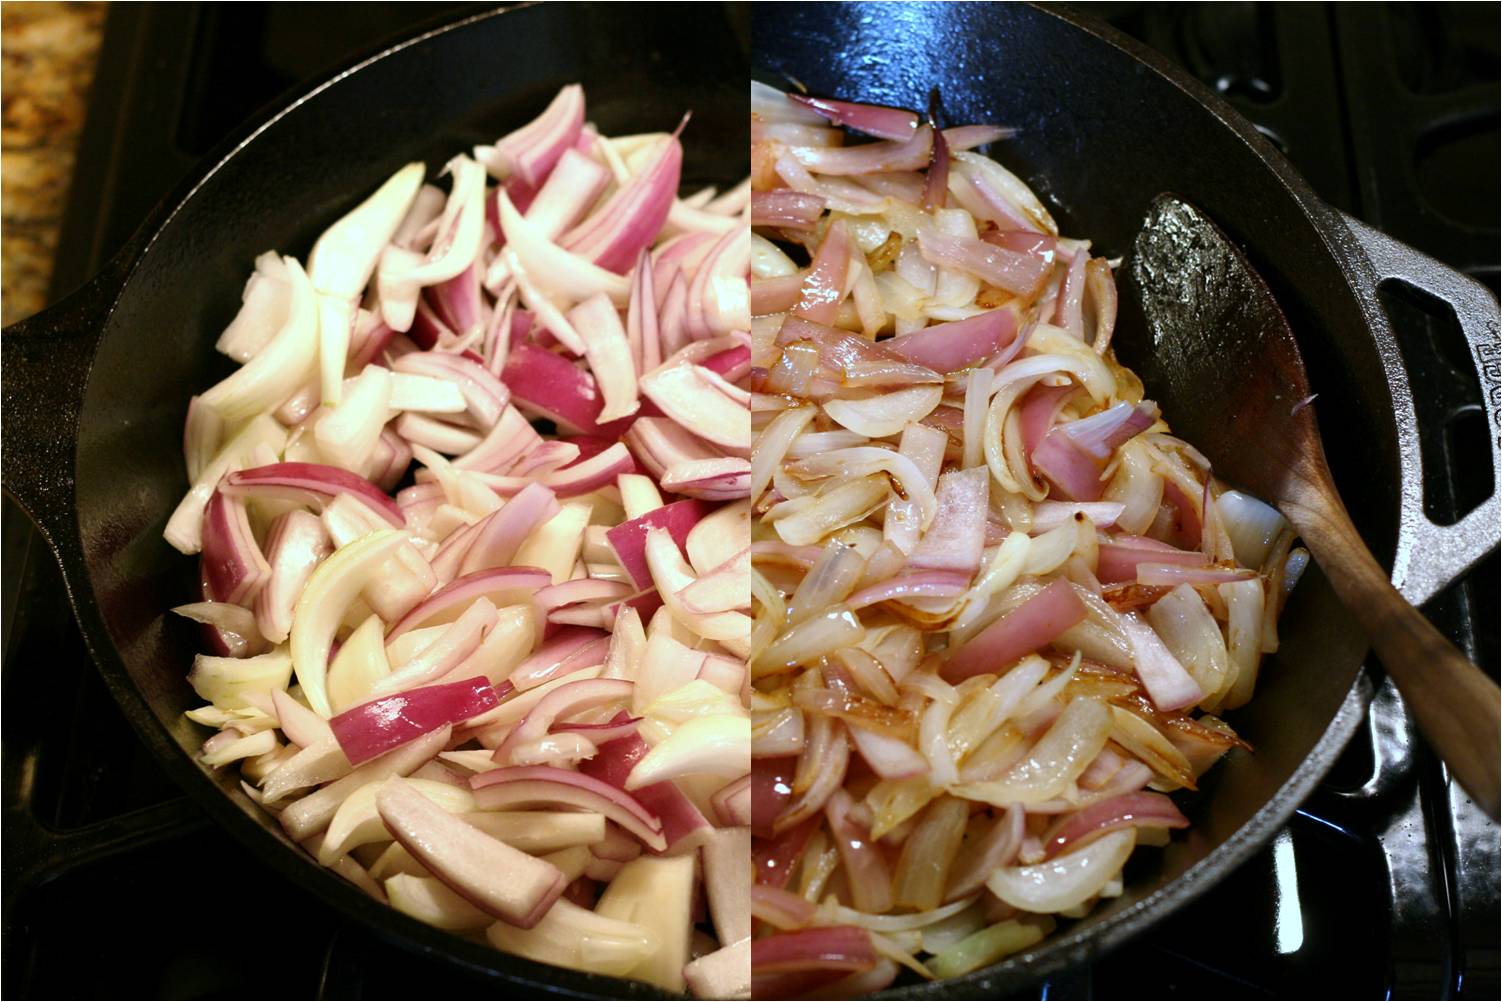
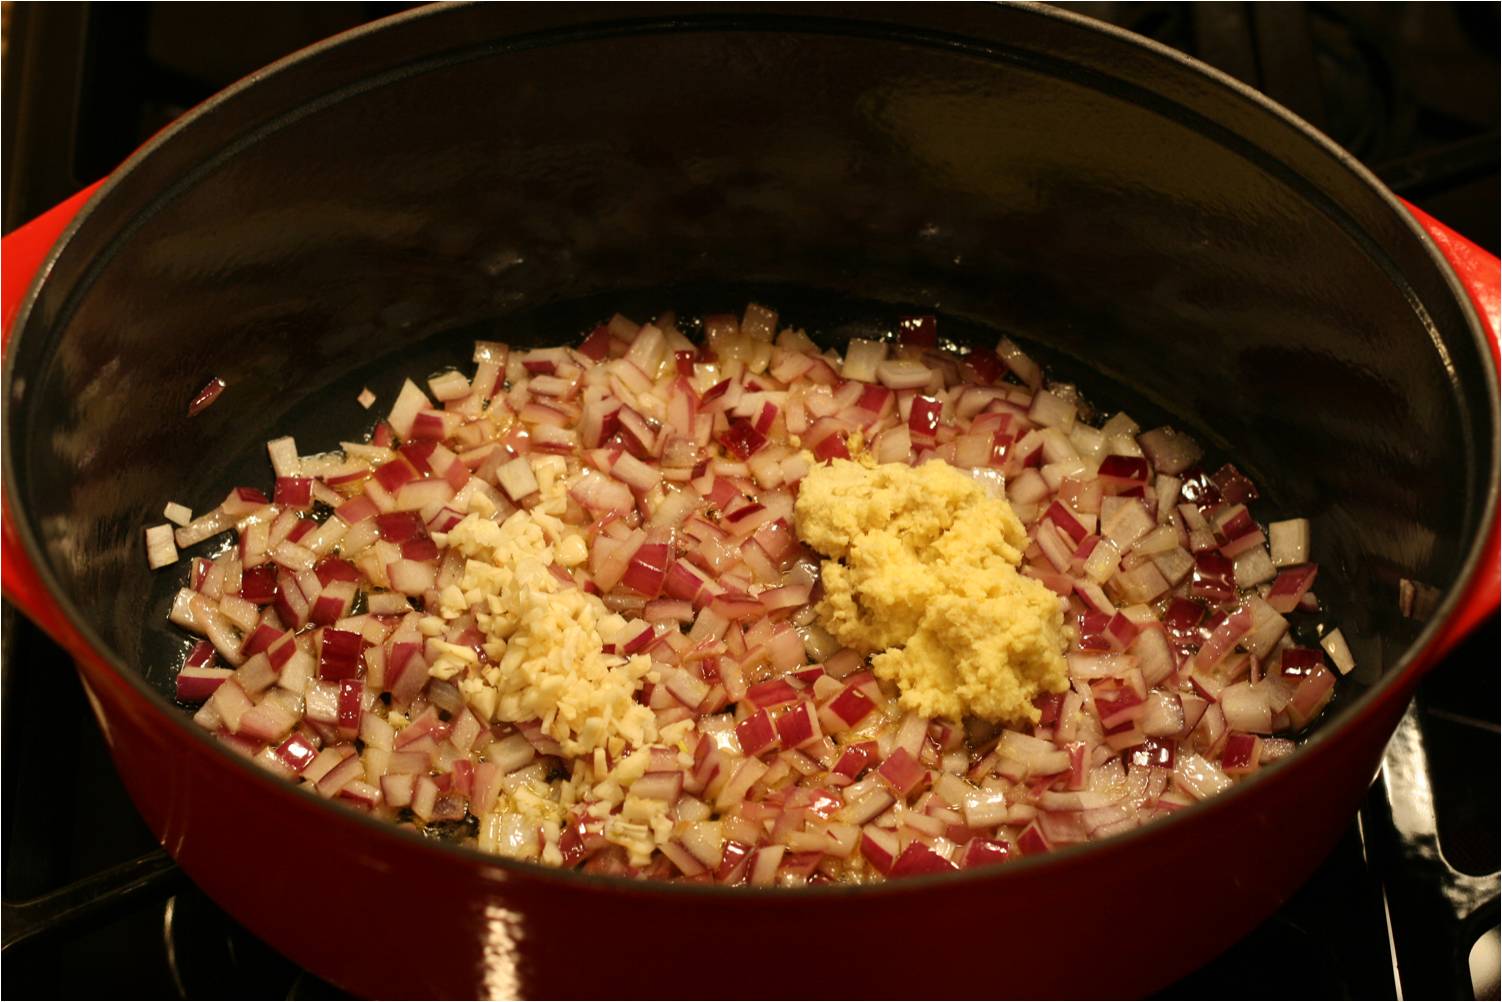
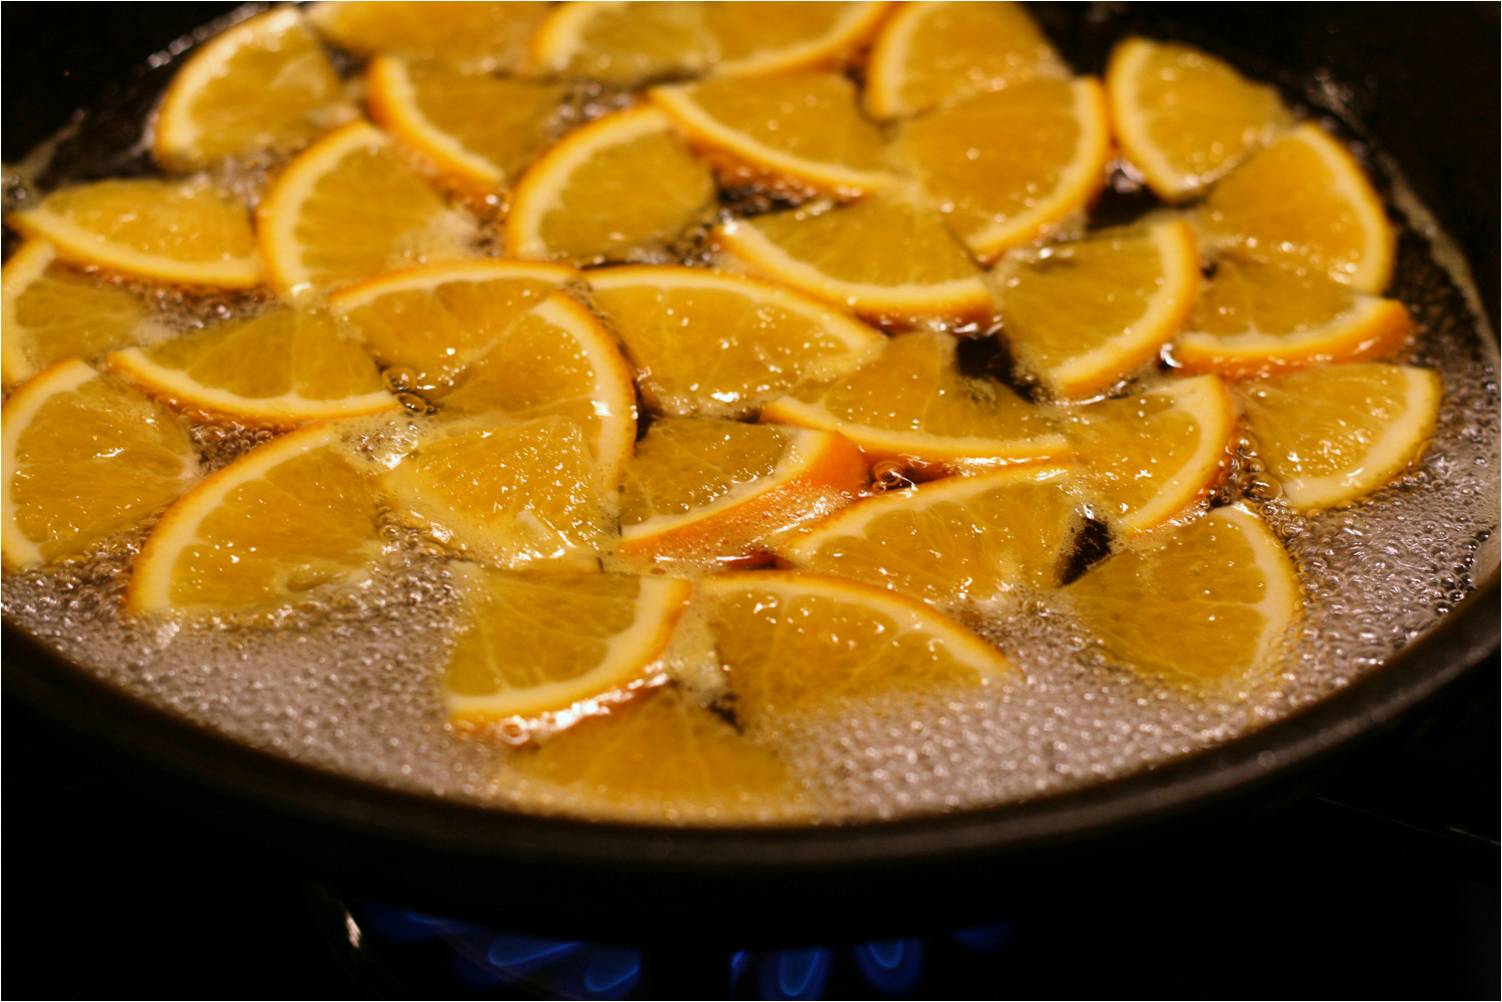
In a large skillet (preferably not non-stick), heat 2 tablespoons of olive oil over medium-high heat until shimmering. Add the onion slices, stirring to coat well. Spread out the onions to cook in an even layer. Stir occasionally remembering to spread them out to cook after each stir.

After about 12-15 minutes, the onions will begin to brown on the edges. Reduced the heat to medium-low and continue cooking until the onions have caramelized to a nice brown color, about 15 minutes more.

Chopped Celery and Thyme

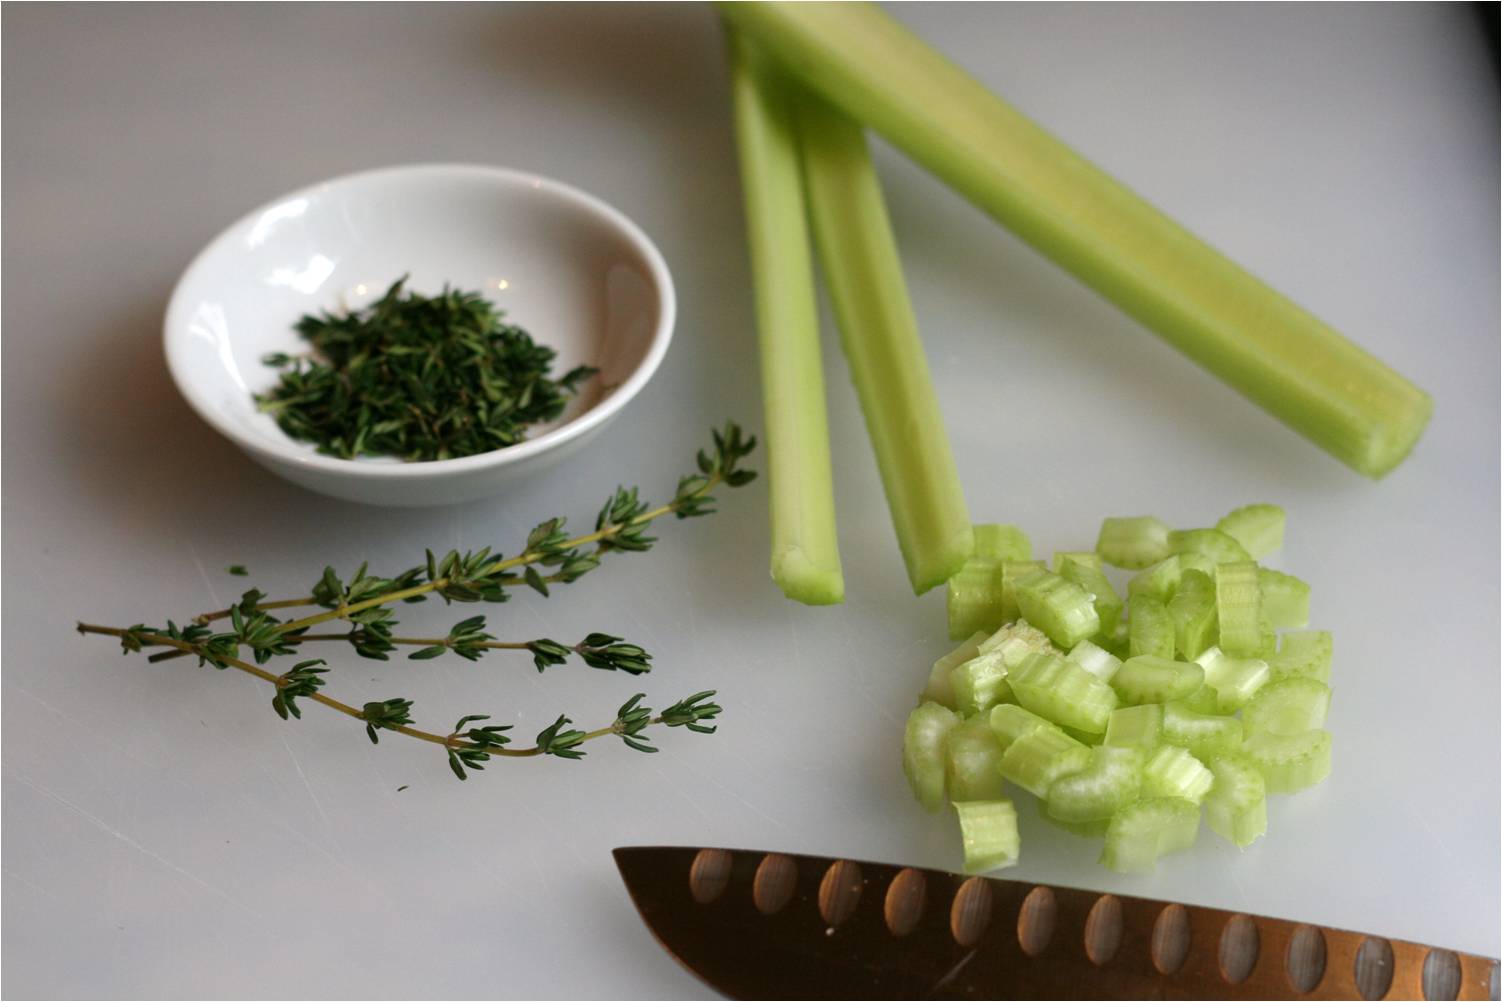
While the onions are caramelizing, prepare your celery. Slice down each rib lengthwise splitting it in half. Chop them into ¼ inch pieces. Repeat for the rest of the celery and set aside. You can also start plucking the thyme leaves off their stems to measure out 1½ tablespoons.

Finish Caramelized Onions

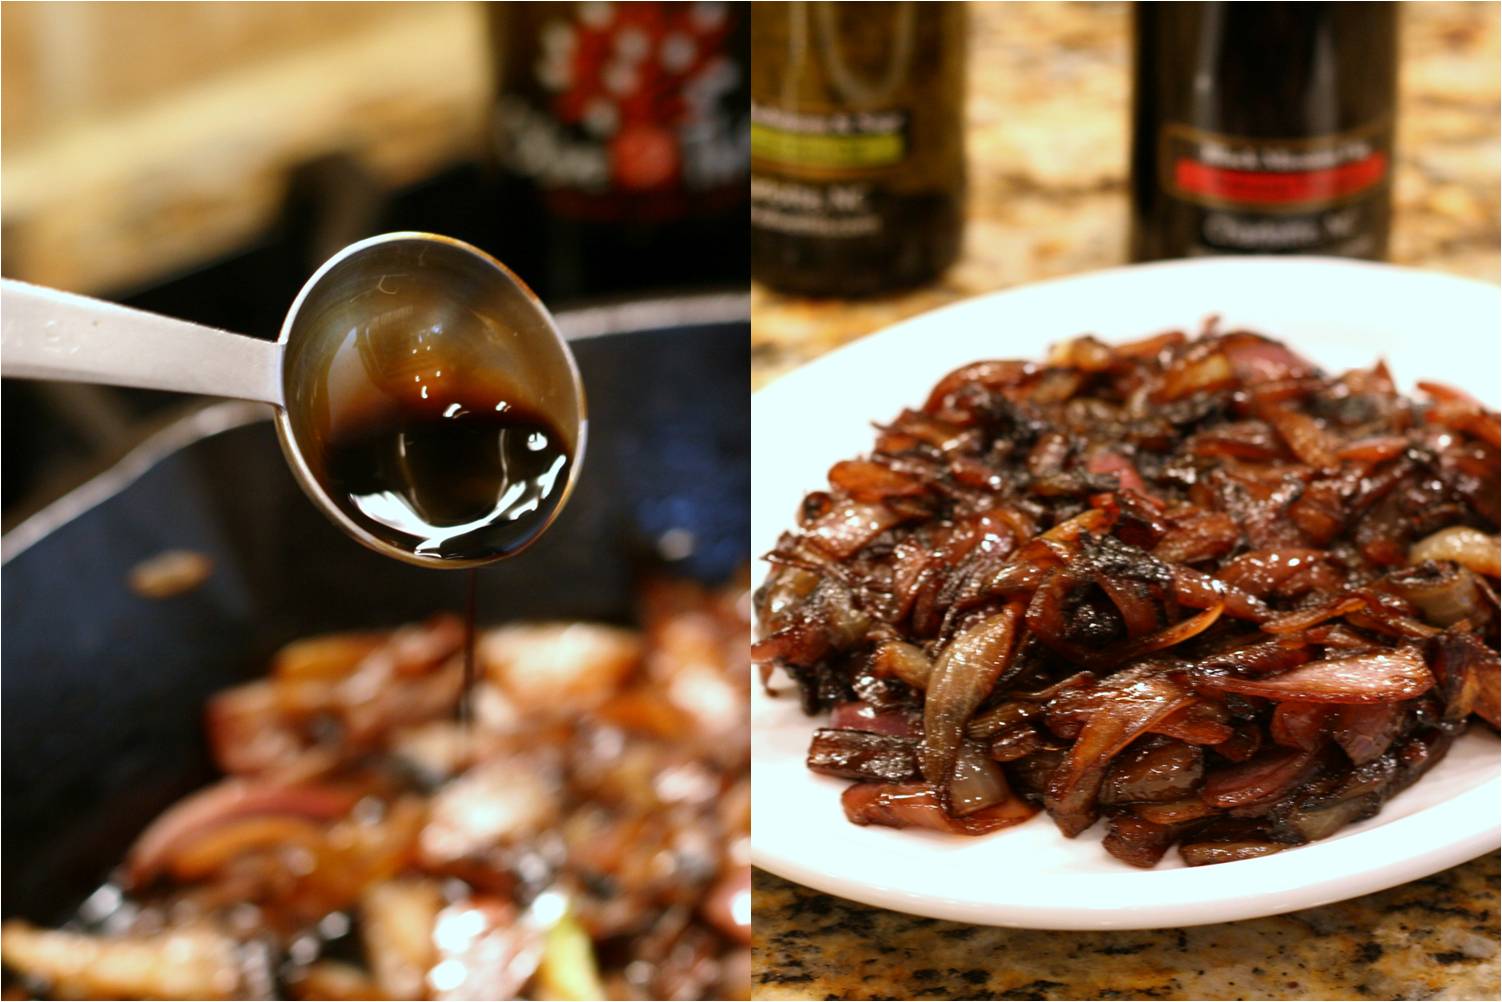
Once the onions have caramelized, add the 3 tablespoons of balsamic and cook for an additional 5-10 minutes until the vinegar reduces by about half. Remove from heat and set onions aside. No need to wash the skillet just yet.

Cooking Celery and Mushrooms

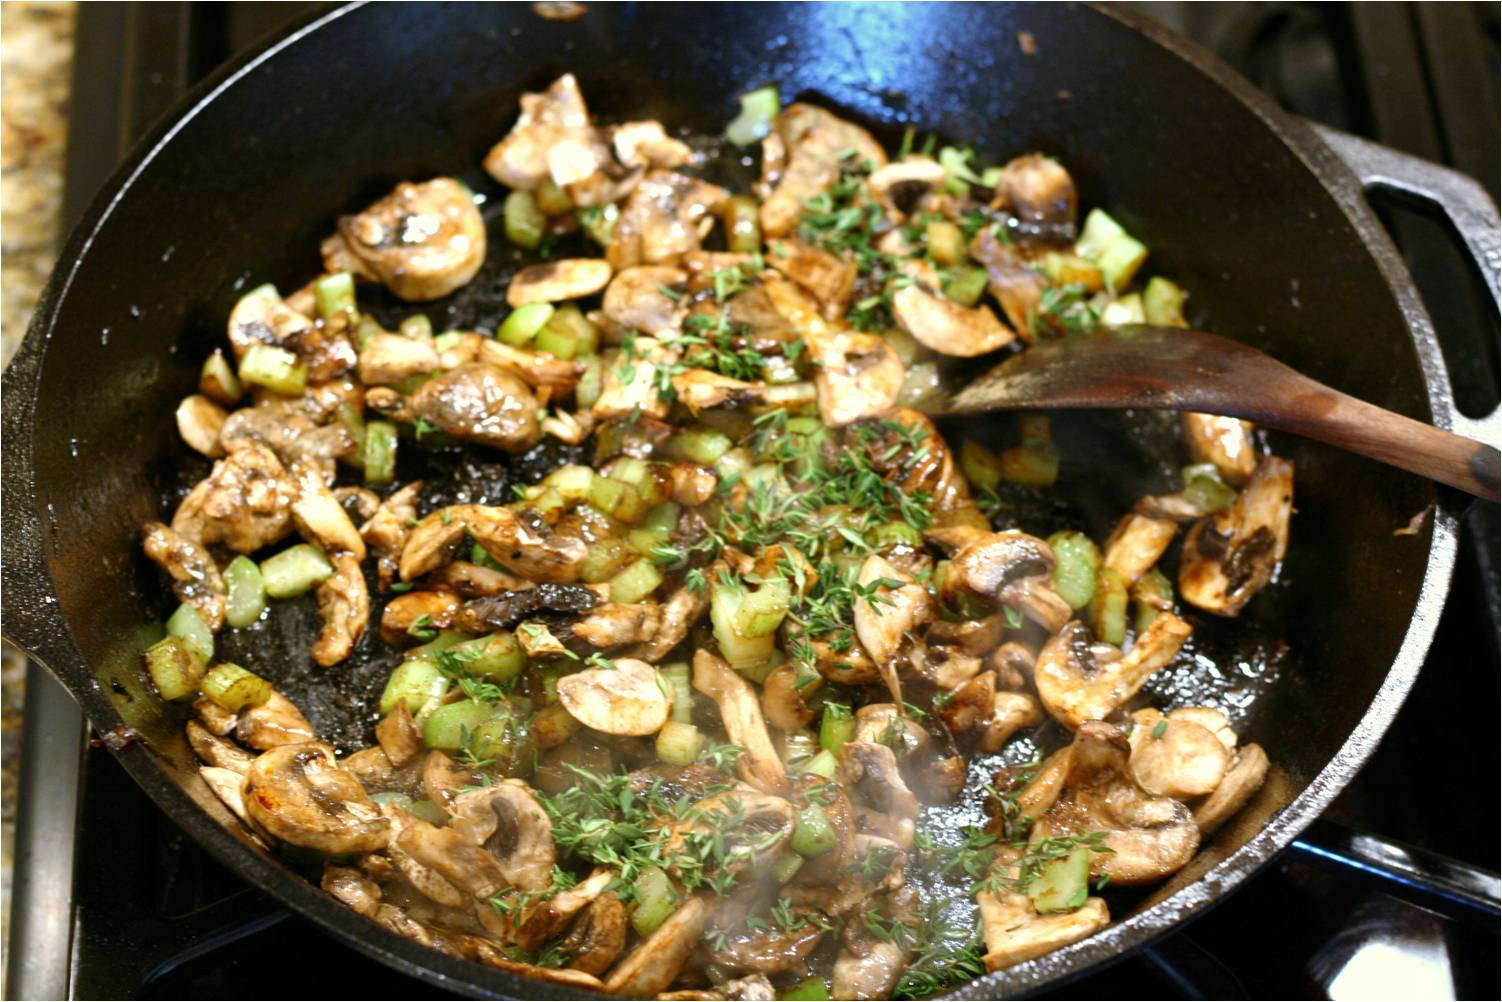
Make sure your oven is preheating to 400 degrees F. Using the same skillet, heat the remaining 2 tablespoons of olive oil over medium-high heat until shimmering. Add the chopped celery and mushrooms and sauté stirring occasionally, until softened, about 5-8 minutes. Add in thyme leaves and marjoram and cook until fragrant, about 1 minute.  Transfer celery/mushroom mixture to a large mixing bowl.

Mix rest of Ingredients for Pumpernickel Stuffing

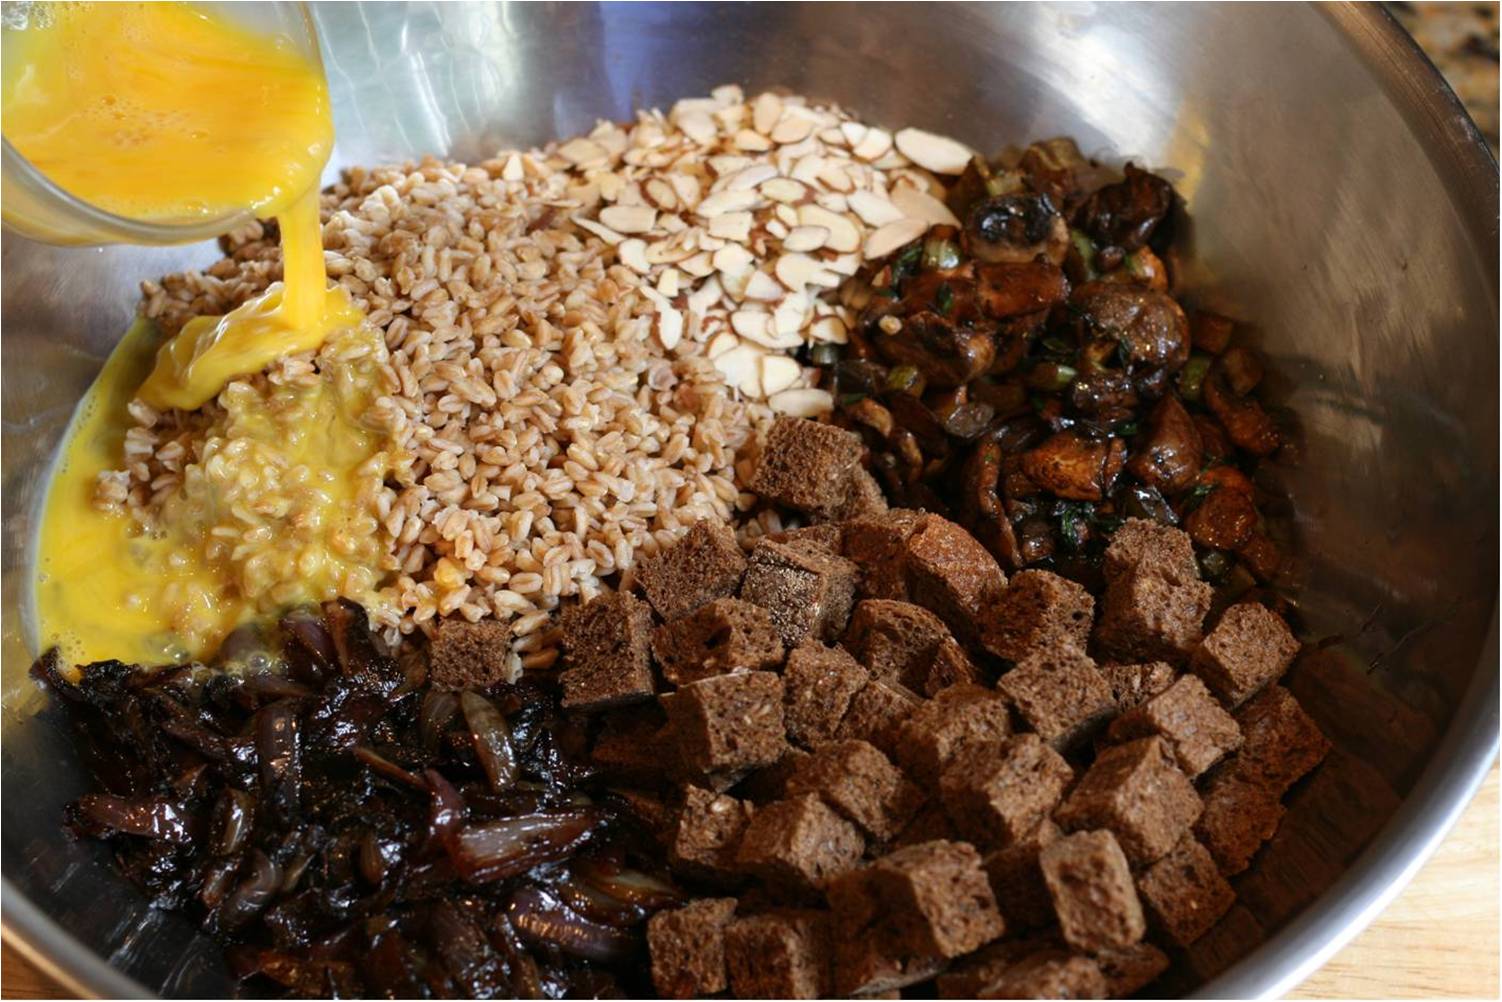
To the celery/mushroom mixture add the cooled bread cubes, caramelized onions, lightly beaten eggs, cooked farro, the ½ cup of sliced almonds, 1½  teaspoons of salt, 1 teaspoon of black pepper. Pour in the  1½ cups of chicken stock and gently toss to fully combine the wet and dry ingredients evenly.

Pumpernickel Stuffing Before Oven

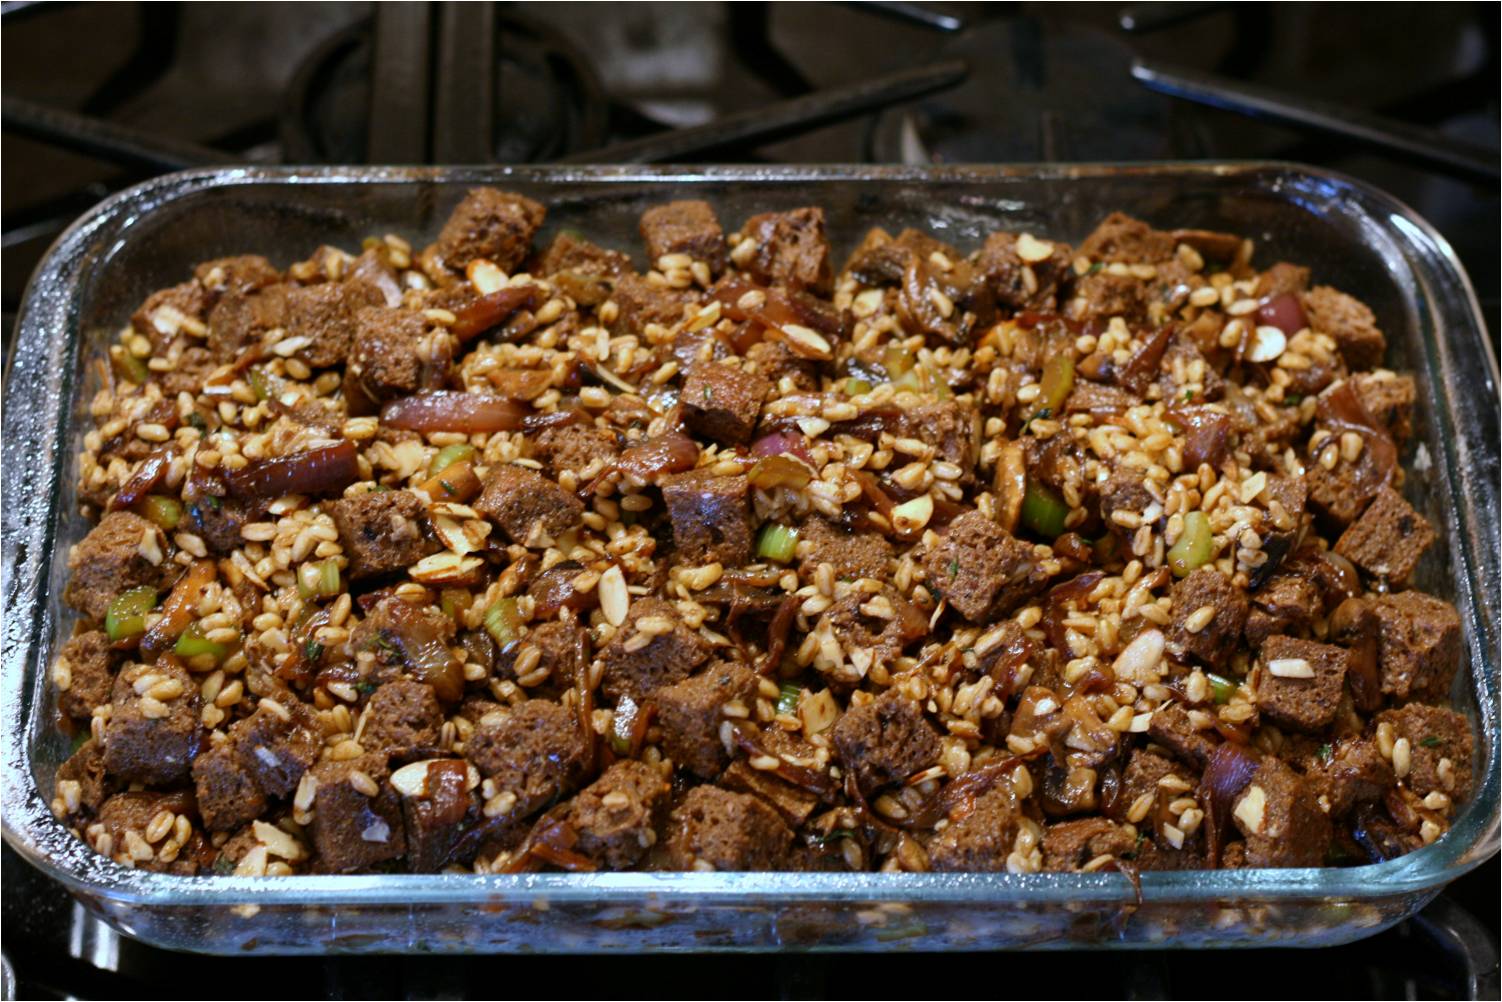
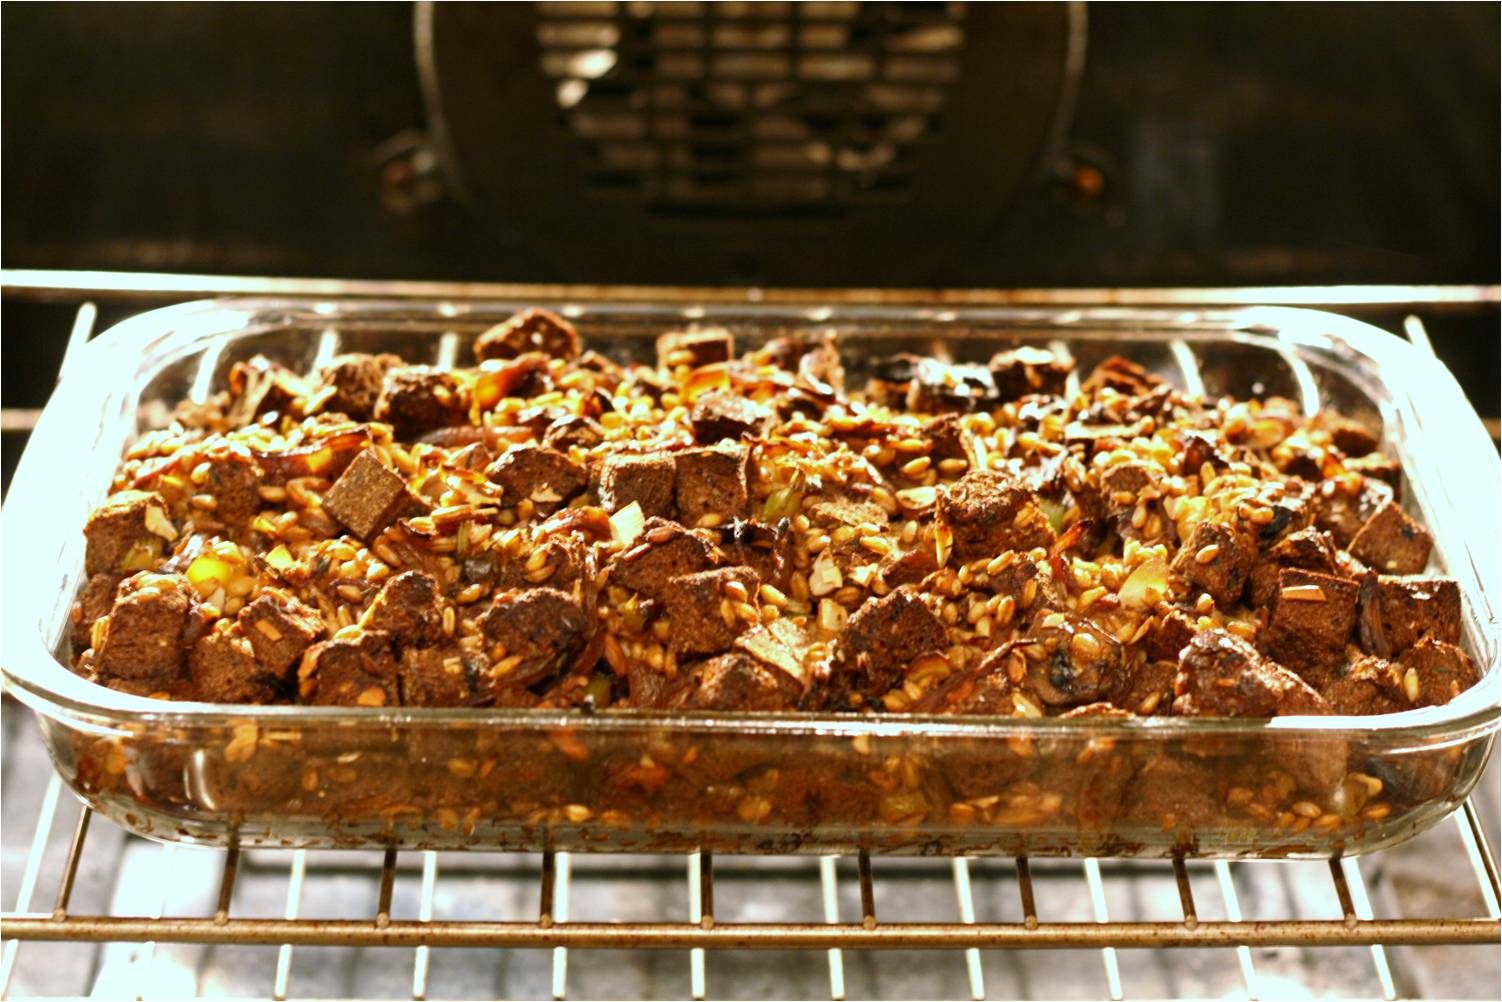
Transfer mixture to a 13 by 9-inch baking dish lightly brushed with olive oil. Cover with foil and bake for 20 minutes. Remove foil and continue to bake for another 30 minutes or until the tops are begin to brown and crisp up a bit.

Pumpernickel Stuffing Baked

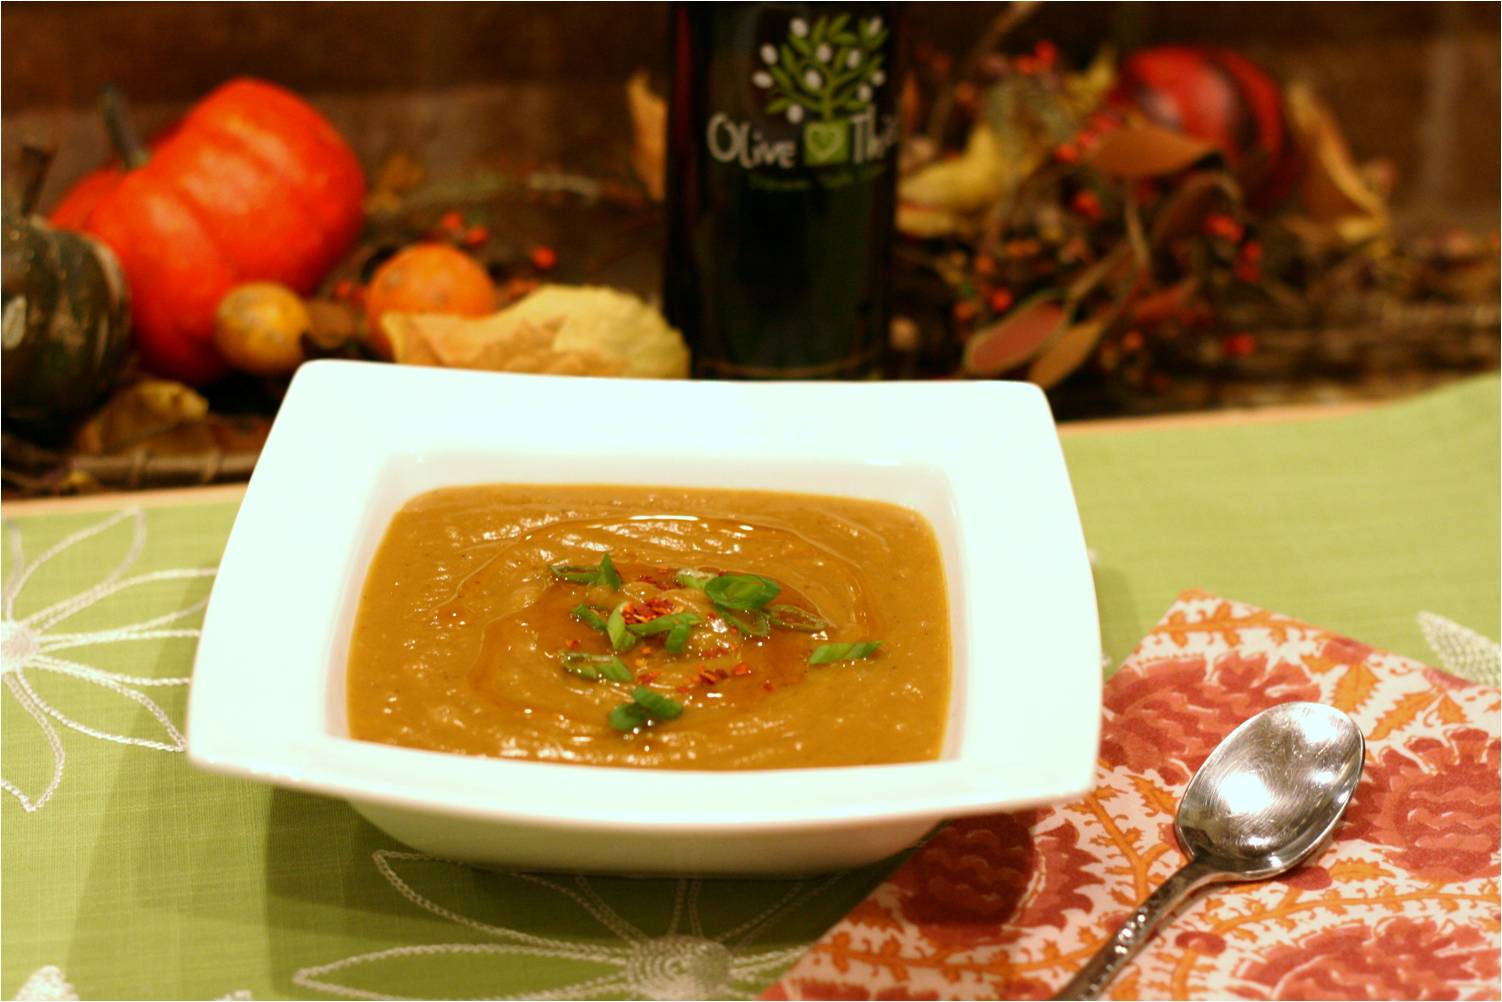
Remove from oven and let cool for about 10 minutes before serving. Garnish with chopped celery leaves. Enjoy!

IF MAKING AHEAD: Prepare ingredients and assemble into oiled baking pan. Cover tightly with plastic wrap and refrigerate for up to 1 day. When ready to bake, place stuffing on counter for 30 minutes to bring to room temperature. Replace plastic wrap with foil and bake according to above directions.

SERVES 10-12

Have a comment? We’d love to hear from you. Have you tried this dish? Do you have a variation that you think others will enjoy? Leave us a comment below.

Spiced Pumpkin Cheesecake with Maple Balsamic Swirl

Spiced Pumpkin Cheesecake with Maple Balsamic Swirl Feature

‘Tis the season for pumpkin. Whether it’s pumpkin muffins, pies or cookies we love to bake with pumpkin this time of year. We also associate the holidays with richer desserts like creamy, velvety cheesecake. We pulled out one of our favorite recipes from Cooks Illustrated that combines the two into a spiced pumpkin cheesecake but…we took it a little further. By swirling in the sweet and tangy flavor of our maple balsamic, we discovered a delectable and gorgeous indulgence that wasn’t overly sweet. Our good friends Laura and Joe – who are quite the foodies themselves – helped out in the tasting department. You can make this cheesecake up to three days in advance but keep in mind after one day the crust will start to lose its crispness. Don’t be intimidated by the long list of ingredients or the “water bath” method of baking; most of the ingredients on the list are spices and we show you step-by-step how to do it all.  Another bonus, this dessert is definitely a make-ahead dish; which always helps during the holidays. One taste of the smooth and rich texture of this dessert and you’ll agree, it’s definitely worth it!

INGREDIENTS

Pumpkin Cheesecake Ingredients

CRUST

  • 5 ounces graham crackers (9 whole crackers), broken into large pieces
  • 3 tablespoons granulated sugar
  • ½ teaspoon ground ginger
  • ½ teaspoon ground cinnamon
  • ¼ teaspoon ground cloves
  • 6 tablespoons unsalted butter, melted

FILLING

  • 1 1/3 cups granulated sugar (10 1/3 ounces)
  • 1 teaspoon ground cinnamon
  • ½ teaspoon ground ginger
  • ¼ teaspoon ground nutmeg
  • ¼ teaspoon ground cloves
  • ¼ teaspoon allspice
  • ½ teaspoon table salt
  • 1 15-ounce can of pure pumpkin
  • 1 ½ pounds cream cheese (3 8-ounce bars), cut into 1-inch chunks and left to soften at room temperature, about 30 minutes
  • 1 tablespoon vanilla extract
  • 1 tablespoon fresh lemon juice
  • 5 large eggs, left at room temperature, about 30 minutes
  • 1 cup heavy cream
  • 3 tablespoons Olive This! Vermont Maple Balsamic

DIRECTIONS

Before you start the crust, set out the eggs and chunks of cream cheese at room temperature. Place the oven rack at the lower-middle position and preheat the oven to 325 degrees F. Prepare a 9-inch spring-form pan by spraying the bottom and sides with cooking spray (alternatively, you could brush the bottom and sides with olive oil).

Prepare Graham Cracker Crust

Place the graham cracker pieces, 3 tablespoons of sugar, ½ teaspoon of cinnamon, ½ teaspoon of allspice and ¼ teaspoon of cloves into a food processor fitted with a steel blade. Pulse mixture 15 times for about 2 seconds each. When finished, pour crumb mixture into a bowl and drizzle the 6 tablespoons of melted butter. Mix well until evenly moistened.

Press Graham Cracker Crust into Pan

Transfer the crust mixture into prepared spring-form pan and spread into an even layer.  Using a large spoon or drinking glass, press crumbs evenly into pan bottom and up the sides about halfway. Bake crust in the oven for about 15-18 minutes until browned around the edges. Cool on a wire rack while preparing the cheesecake filling.

Press Pumkin with Paper Towels

To achieve the right consistency, it helps to remove some of the excess moisture found in canned pumpkin. Line a baking sheet with several layers of paper towels. Place the pumpkin onto the paper towels and spread it out evenly with a spoon. Place another 2 or three layers of paper towels on the pumpkin and press firmly to remove as much moisture as possible.

Roll Pressed Pumpkin

Peel back the top layer of paper towels and discard. Take hold of the bottom layer paper towels and fold pumpkin over enough times to “roll it off” the bottom layer and discard towels.

At this point, you’ll want to boil some water for the water bath process described in a later step. Put about 4 quarts or water on the stove in a large stock pot. Bring this to a boil as you finish making the cheesecake filling.

Make Spiced Sugar Mixture

In a small bowl whisk the sugar and spices (1 teaspoon ground cinnamon, ½ teaspoon ground ginger, ¼ teaspoon ground nutmeg, ¼ teaspoon ground cloves, ¼ teaspoon allspice, and ½ teaspoon table salt) from the list of filling ingredients. Set aside.

Add Spiced Sugar Mixture to Cream Cheese

Using a stand mixer with the paddle attachment, beat the cream cheese on medium speed for about 1 minute. Add one third of the spiced sugar mixture to the cream cheese and continue to beat for one minute. Stop and scrape down the insides of the bowl and paddle with a spatula. Repeat two more times for the remaining two thirds of the sugar/spice mixture; mixing for one minute and scraping down the bowl for each addition.

Add Pumpkin to Cream Cheese Batter

Add the pumpkin, vanilla, and lemon juice to the mixture and beat at medium speed to combine, about 45 seconds; scrape bowl.

Add Eggs to Pumpkin Cheesecake Filling

You will be adding the eggs in two stages. Turn the speed of the mixer to medium-low and add 3 of the 5 eggs. Beat for about 1 minute until well combined and scrape down the bowl with a spatula. Add the remaining 2 eggs and repeat the mixing (for 1 minute) and scraping. Pour in the one cup of heavy cream and beat for about 45 seconds on low speed. Remove the bowl from the mixer, scrape the sides of the bowl with the spatula and give the mixture a final stir by hand.

Wrap Spring Form Pan with Foil

As the testers at Cooks Illustrated point out, a water bath is commonly used when baking cheesecakes and custards because it moderates the temperature around the perimeter of the pan, preventing overcooking at the edges and a “pudding” center. It’s quite simple; rather than placing the spring-form pan directly on the oven rack, place it into a larger roasting pan filled with about 2-3 inches of hot water and bake the whole thing together. However, spring-form pans are not water tight so we wrapped ours with heavy duty (wide) foil to prevent the water from leaking in (nobody likes a soggy crust!).  Wrap the spring-form pan in a double layer of foil bringing the foil up to the top edge of the pan (as pictured above).

Pour Pumpkin Cream Cheese Batter Into Crust

Place the wrapped spring-form pan into your roasting pan and fill with cheesecake batter. Smooth the top of the batter with a spatula. You may have extra filling left over, depending on your spring-form pan, but do not overfill. We used a 9-inch spring-form pan and had about a cup of filling left over.

Drizzle Maple Balsamic on Cheesecake

Once the batter is poured, drizzle about 2-3 tablespoons of the maple balsamic over the cheesecake batter in a circular pattern. It doesn’t have to be pretty at this stage.

Cut Balsamic Drizzle with a Knife

Using a small knife, “cut” the balsamic vinegar from the outside edge towards the center; creating the concentric pattern. Here’s where you express your artistic side!

Fill the Roasting Pan with Boiling Water

By now your hot water is probably at a boil. Gently pour enough water into the roasting pan to come about halfway up the sides of your spring-form pan.

Carefully transfer the roasting pan to the preheated oven. Bake until the center of the cake comes to 145-150 degrees on an instant-read thermometer. For us, this took about 1¼ hours but depending on the oven and the temperature of your ingredients it could take 15 minutes longer. Rely on your thermometer here. Also, even when the internal temperature reaches 145-150 degrees, the cheesecake will still be a little wobbly in the center; that’s fine.

Paring Knife Around Cheesecake Edges

Cooling the cheesecake is an important step in the process. Cheesecakes sometimes split in the middle and that’s okay – it all tastes the same. However, if you’re shooting for a presentation without “cracks” there are a few steps that may help.

As soon as you take the roasting pan out of the oven, run a small knife around the inside of the spring-form pan to loosen and separate the cake from the sides. The cheesecake is still sitting in the water bath at this point.

Baked Pumpkin Cheesecake in Bath

Place the roasting pan on a cooled stove-top or a wire rack to let the water bath cool gradually; about one hour. Next, remove the spring-form pan from the water bath, remove the foil and discard. Place the spring-form pan directly on the wire rack; we ran a knife around the inside edges one more time just to be sure it separated from the pan ring. Let the cheesecake fully cool to room temperature, about another 3 hours.

Finally, wrap with plastic wrap and chill in the fridge for at least 4 hours and up to 3 days.

Before serving, let the cheese cake stand at room temperature for about 30 minutes. When slicing your cheesecake, it helps to use a sharp knife with a narrow blade frequently dipped in hot water.

Slice of Spiced Pumpkin Cheesecake

After your first bite, you’ll notice the velvety smooth and consistent texture along with the rich spiced pumpkin flavor. You’ll quickly realize that it was all worth it!

MAKES ONE 9-INCH CAKE, SERVING 12 TO 16

Have a comment?  We’d love to hear from you.  Have you tried this dish?  Do you have a variation that you think others will enjoy?  Leave us a comment below.


Orange Cranberry Sauce with Peach White Balsamic Vinegar

Orange Cranberry Sauce with Peach White Balsamic Vinegar Feature

It’s that time of year when bags of fresh cranberries are abundant in the grocery store. When making homemade cranberry sauce many folks might stray from the back-of-the-bag preparation by using orange juice instead of water. We wanted to build upon that and incorporate more of a citrus-cinnamon kick without being overpowering. Slices of orange rinds are used directly in this dish for more citrus flavor and just a half of a cinnamon stick was enough to achieve a good balance. Through our experimenting we discovered that our white balsamic vinegars perfectly align to the sweet and tart tug-o-war flavor profile typically found in cranberry sauce. We settled on peach flavored balsamic but we also found our Cara Cara Orange Vanilla just as good. Even if you just add a tablespoon or two at the end of those package directions, you’ll discover the difference and have your guests wondering about your secret ingredient!

.

INGREDIENTS

Orange Cranberry Sauce Ingredients

DIRECTIONS

Rinse Cranberries and Drain

Rinse the cranberries thoroughly removing any stems, leaves or rotted berries. Drain well.

Prepare Orange Zest

Using a sharp knife, carve four 1-inch strips of rind from the outside of the orange. Slice each strip into matchstick-sized pieces and set aside.

Ream Orange Halves

After removing the strips of rind from the orange, slice it in half. Juice both halves of the orange into a medium saucepan. Include any pulp as well.

Add Cranberry Sauce Ingredients to Saucepan

To the same saucepan, add the drained cranberries, the orange zest, ½ of a cinnamon stick, and sugar.  Stir well to combine and place over medium-high heat. It may seem like you don’t have enough liquid at the start but the berries will cook down.

Simmer Cranberries

Once boiling reduce heat to medium-low and simmer, uncovered, until the sauce thickens and the cranberries burst, about 12-15 minutes.

Add White Balsamic to Cooked Cranberries

When the cranberries are done, remove from heat and add the 2 tablespoons of white balsamic vinegar.  Stir well to distribute and let cool. Serve at room temperature or refrigerate for up to a day. Be sure to remove the ½ cinnamon stick (or pieces) before serving. Enjoy!

MAKES ABOUT 1½ CUPS

Have a comment?  We’d love to hear from you.  Have you tried this dish?  Do you have a variation that you think others will enjoy?  Leave us a comment below (providing your email address is not necessary).

Apple Balsamic Chunks with Toasted Walnuts

Apple Balsamic Chunks with Toasted Walnuts Feature

Around here in the fall apples are everywhere and we’re always looking for new (and easy) ways to use them. Just like our recipe for Roasted Pears and Raspberries, this is another great recipe that pairs fresh fruit pieces with balsamic vinegar and best of all, it calls for no additional sugar! The tart flavor of balsamic vinegar perfectly balances the sweetness of the apples. With this dish, there’s no baking necessary; it all happens in a skillet on the stove top. You can serve it at room temperature so it can easily be made ahead. However, for a special dessert serve it warm with vanilla ice cream – you may want to drizzle extra balsamic directly over the ice cream too! Save any leftover apple chunks because they make breakfast come alive. Serve them with your oatmeal or as a brunch-worthy addition to your pancakes or waffles.

INGREDIENTS

Apple Chunks Ingredients

DIRECTIONS

Peel and dice apples

Peel, core and chop apples into 1- to 1½-inch cubes.

Add Cinnamon to Apple Chunks

Heat the 1 tablespoon of lemon olive oil in large non-stick skillet over medium-low heat. In a large bowl, toss the apple chunks with the 1 tablespoon of cinnamon and pinch of salt. Toss well to evenly coat.

Cook Apple Chunks in Skillet

Transfer apples to hot skillet and cook for about 12-15 minutes, stirring occasionally until the pieces begin to soften. Rely on visual cues more than the clock. Some of the chunks will become softer faster and actually begin to break down. This is a good sign; you want some pieces to become the “sauce” while some pieces remain firm. When this happens, turn off the heat.

Toast Walnuts

While the apples are cooking, toast the walnut pieces in a dry skillet over low heat for about 10-12 minutes; flipping occasionally. You may want to set a timer for these; in the OT kitchen we always forget about them!

Add Balsamic to Apple Chunks

When the apples are done, remove from heat and add the 3 tablespoons of balsamic vinegar and about ½ cup of the walnuts, setting the remaining ¼ cup walnuts aside for garnishing.

Serve hot with vanilla ice cream or yogurt and garnish with the reserved toasted walnuts. If desired, drizzle extra balsamic over the ice cream or yogurt too. Enjoy!

SERVES 6

Have a comment? We’d love to hear from you. Have you tried this dish? Do you have a variation that you think others will enjoy? Leave us a comment below.


In the News…

April 5, 2018

Deoleo settles landmark lawsuit for $7 million 

The verdict is in! Large commercial olive oil producers are being held accountable for facts and best practices we’ve been preaching for years. Clear glass bottles allow sunlight to degrade olive oil. Harvest date matters; use by date is meaningless. “Imported from Italy” is not equal to grown & harvested in Italy. Read this article to learn about the class action lawsuit settled by Bertolli.

OCTOBER 14, 2016

Coconut oil may taste good, but it’s no cure-all. Here are the facts

we-coconutoil“Should I switch to coconut oil?” is consistently one of the most common questions that come across my desktop. The study found that coconut oil, which is 92 percent saturated fat, raises LDL (bad) cholesterol less than butter does, but significantly more than unsaturated plant oils do. So when it comes to heart health, “It would be dangerous, and rather silly, to replace your extra-virgin olive oil with coconut oil.” There — that question is answered. But there are plenty of details and nuances where that came from, so read on.

September 27, 2016

fatty-dietFatty diet activates oldest branch of immune system, causing intestinal tumors

Research continues to show that corn and coconut oil are not good for you.


OCTOBER 2, 2014

Pink Ribbon DietBreast Cancer Awareness Month & Dr. Mary Flynn’s Presentation for the Advanced Course at UC Davis Olive Center

People raised on diets that daily include extra virgin olive oil have lower rates of most chronic diseases, such as less heart disease, cancers, arthritis, and type 2 diabetes. See article…


NOVEMBER 1, 2013

imageOlive and Well: Oakland Business Sets New Standard for Olive Oil.

John Leckie reports on the new standards for high quality olive oil highlighting our distributor, Veronica Foods.

October 29, 2013

Carmel-Color Free BalsamicOlive This! Infused Dark Balsamic Vinegars Now Caramel Color-Free!

October 2, 2013

Non-GMO-projectOlive This! Certified to Have Non-Genetically Modified Organisms


SEPTEMBER 16, 2013

Why Cooking with Extra Virgin Olive Oil is ALWAYS Better For You

August 19, 2013

UP EVOO Image (Duplicate)Olive This! Becomes First Store in Charlotte, North Carolina to Earn Ultra Premium Certification


JULY 7, 2013

olive-oilIs Your Olive Oil As Healthy As You Think?

An insightful article by Katherine Tallmadge, R.D. from livescience.com

March 27, 2013

Mother and Must Vinegar PictureWhat is Mother?

Information About Balsamic Vinegar

February 26, 2013

An article in the Wall Street Journal about Olive Oil and the Mediterranean Diet


Olive This! Infused Dark Balsamic Vinegars Now Caramel Color-Free!

Carmel-Color Free BalsamicOlive This! is proud to announce that all of our infused dark balsamic vinegars are now caramel color-free! This wasn’t a small feat. Bringing this to fruition took years, and was only possible because of the steadfast partnership between our wholesaler, Veronica Foods, and the world’s oldest and most respected balsamic maker in Modena, Italy, who has a deep understanding and appreciation for continuously raising the quality bar and stood with us in this unique endeavor. This makes our products one of only a few in the world that are truly color-free! To achieve this, the ‘must’ of the Trebbiano grape is used to make our Traditional balsamic which is cooked in copper kettles over an open wood fire in the “Traditional Style”. This time honored method of making balsamic naturally thickens and deeply caramelizes the grape sugar which turns a rich, dark mahogany-brown. This method of production also adds the unmistakable complexity and richness for which our product is known. Just like the non-GMO certification we just received, Olive This! is excited to continue to bring you natural, great tasting products.

Coconut Curry Butternut Squash Soup with Spicy Olive Oil

Coconut Curry Butternut Squash Soup Feature

As the fall temperatures get cooler, we always seem to remember how nothing satisfies better than a warm bowl of soup. And why settle for something bland and out of the can when you can really get into the season by making soup from scratch? We found a basic recipe from Martha Stewart but of course, we experimented by kicking it up a notch with our spicy infused olive oils. The combination of sweet coconut milk and spicy olive oil pairs well with the sweet and savory balance found in the curry powder. Use our Chipotle olive oil for a flavor that’s hot; our Harissa olive oil if you want to go hotter; and our Cayenne olive oil for the hottest we offer. If whole butternut squash is not available in your area or you want to save a little time, many grocery stores carry packaged butternut squash already peeled, seeded and cubed. One great thing about this soup is you can make it ahead of time. Just reheat when ready to serve; makes entertaining a breeze.

INGREDIENTS

Curried Coconut Butternut Squash Soup Ingredients

  • ¼ cup plus extra for drizzling Olive This! Chipotle olive oil (hot), or Harissa olive oil (hotter), or Spicy Calabrian Pesto (hottest)
  • 1 cup chopped red onion
  • 3 cloves garlic, roughly minced
  • ¼ cup minced fresh peeled ginger
  • 4 bay leaves
  • 2½ pounds butternut squash, peeled, seeded, and cut into chunks
  • 1½ teaspoons kosher salt
  • 1 teaspoon curry powder
  • 2 cups chicken stock, heated
  • 1 tablespoon brown sugar, lightly packed
  • 1 15-ounce can light coconut milk
  • Freshly chopped scallions, for garnish
  • Red pepper flakes, for garnish

DIRECTIONS

Prepare Butternut Squash Vegetables

Peel, seed and cube the butternut squash into 1” square chunks. Roughly chop the red onion. Mince the garlic and peel and grate the ginger.

Cook Red Onions and Garlic for Butternut Squash Soup

In a large Dutch oven heat the spicy olive oil over medium heat until just shimmering. Add chopped red onions and cook for about 2 minutes, stirring occasionally. Add the garlic and ginger and continue cooking for about 3 minutes until the onions are translucent. Add the bay leaves and cook for another minute.

Add Butternut Squash to Soup Base

Add the squash, curry powder and kosher salt. Continue to cook uncovered for 10-12 minutes. Meanwhile, measure out the 2 cups of chicken stock into a large glass measuring cup or microwave-proof bowl. Heat the chicken stock in the microwave oven for 2 minutes.

Add stock to Butternut Squash Soup Ingredients

When the squash mixture is done cooking, increase the temperature to medium-high and add the heated chicken stock scraping up the browned bits on the bottom of the pot. Cover and bring the mixture to a boil. Immediately reduce the heat to medium-low and simmer.

Mash Butternut Squash for Soup

Let the mixture simmer for about 15 minutes. Every 5 minutes, stir and mash the squash in the simmering stock. After the third time (total 15 minutes) add the brown sugar and cook for 3 minutes longer.

Add Coconut Milk to Butternut Squash Soup

Add the coconut milk to the mixture and let cook for another 10 minutes.

Remove Bay Leaves from Butternut Squash Soup

You are ready to puree the soup. HOWEVER, remove the bay leaves at this point before you begin.

Immersion Blender in Butternut Squash Soup

Using an immersion blender, puree the soup directly in the Dutch oven to your desired consistency. Alternatively, you can use a blender but do it in small batches. Each batch should only fill the blender container 1/3 of the way. The hot soup is likely to expand.

Garnish Butternut Squash Soup

When ready to serve, reheat the soup (if necessary), adjust any seasonings according to taste and garnish with a drizzle of spicy olive oil, sliced scallions and red pepper flakes for some extra kick.

SERVES 6

Have a comment? We’d love to hear from you. Have you tried this dish? Do you have a variation that you think others will enjoy? Leave us a comment below (providing your email address is not necessary).


Tuscan White Bean Dip

Tuscan White Bean Dip Feature

Here’s a delicious appetizer that travels well to your next party, football game or informal gathering. With all simple ingredients, this savory taste of Italy does not disappoint and is a great alternative to dips from a jar or can. In fact, the rich taste of this hummus-like spread might hide the fact that it’s actually healthy and loaded with fiber. Continue reading “Tuscan White Bean Dip”

Easy Orange Fudge Brownies

Quick and Easy Blood Orange Fudge Brownies FeatureSometimes you just don’t have a lot of time to throw together a dessert suitable for entertaining. Or you just got invited to an impromptu gathering and want to bring something to share. How about something as easy as brownies from a box? All you do is substitute the vegetable or canola oil called for in the recipe with our Blood Orange Fused olive oil. Not only do you end up with a healthier dessert but your fudge brownies have a tasty orange essence all without any additional effort on your part. Okay, with all the time you save you’re thinking you might want to “fancy” it up. We also offer a few steps on how to candy a few orange slices as a garnish, but of course, that’s optional. You’ll be surprised at how a simple citrus substitution can transform a boxed brownie mix into something deliciously different. Give it a try, it can’t get any easier than this.

INGREDIENTS

Quick Blood Orange Brownies Ingredients

OPTIONAL GARNISH INGREDIENTS

  • 1-2 oranges, depending on size and quantity of brownies
  • ½ cup of sugar
  • whipped cream

DIRECTIONS

Use Blood Orange EVOO in Brownie MixPrepare fudge brownies according to package directions substituting equal parts our Blood Orange olive oil for the vegetable or canola oil. Before adding the olive oil, dip a brush into the measuring cup and coat the insides of your baking pan.

While the brownies are baking you may want to consider making the candied oranges as a garnish. Either way, when the brownies are done, cool them completely.

Make Simple SyrupIf making the candied oranges, start a simple syrup. Mix the ½ cup of sugar and 1½ cups of water into a skillet over medium-high heat and bring to a boil.

Slice Orange Slices into QuartersWhile you’re waiting for the simple syrup to boil, cut the oranges into thin slices and then quarters (see photo above).

Add Oranges to Simple SyrupPlace the sliced orange quarters into the boiling syrup and let cook for about 8 minutes turning 2-3 times. Reduce heat to medium and let simmer for about 20-25 minutes turning 2-3 more times; the syrup will become thicker as it cooks.  Keep an eye on it so it doesn’t burn. Then, reduce the heat to low and simmer for an additional 10 minutes. Finally, take the skillet off the heat and let the oranges cool in the skillet for another 10 mins. Transfer the candied oranges to waxed paper and let cool completely.

When ready to serve, garnish each brownie with the whipped cream, candied orange slice, and perhaps a small mint leaf (optional). Enjoy!

Have a comment? We’d love to hear from you. Have you tried this dish or have a variation that others might enjoy? Leave us a comment below and you can ignore the request for your email address.

Fig Balsamic and Rosemary Roasted Pork Loin with Carrots and Potatoes

Rosemary Fig Roasted Pork Loin Feature

Timing is everything. Sometimes planning a meal for company can be daunting especially when you want the vegetables, starch and protein to be ready all at the same time. What if you cooked them all together in the same roasting pan? Not only does this recipe make the timing work perfectly but who wants to wash all those pots and pans anyway? Pork can sometimes turn out dry and tasteless.  Continue reading “Fig Balsamic and Rosemary Roasted Pork Loin with Carrots and Potatoes”

Stay updated with the latest news from Olive This! - Sign up for our newsletter here.

Copyright 2021 - Olive This! - All rights reserved. Privacy Policy.
Site by Horde Marketing, LLC